This post may contain affiliate links. That means if you click and buy, I may receive a small commission (at zero cost to you). Please see my full disclosure policy for details.
We all want to have a Pinterest image go viral. After all, that would lead to increased followers, traffic, and income.
But, the truth is that the likelihood of that happening is pretty slim. Well, at least it is if your images are not working.
Pinterest has been around since 2010. And, since that time it is has grown to the second-largest traffic source in the world.
With more than 200 million monthly users, it can be tough to find your space. But, it is possible. And the way you do that is by creating the images that will stand out.
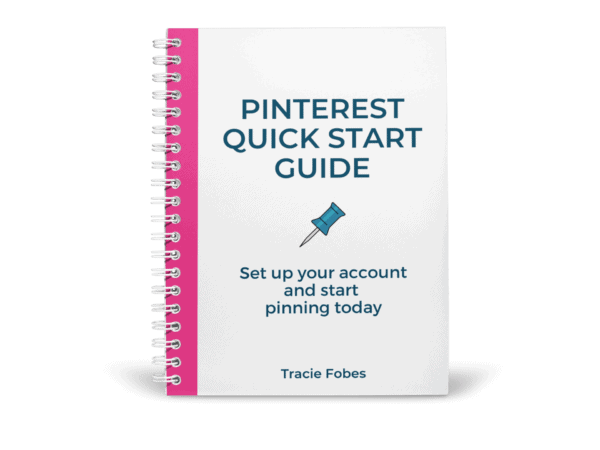
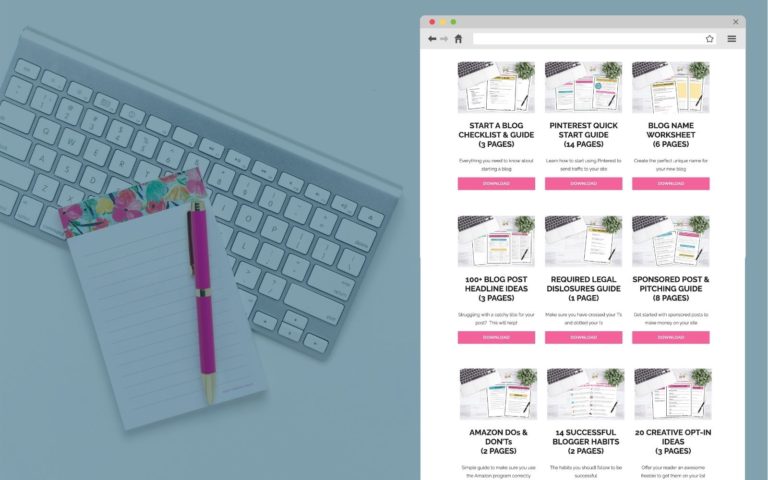
Pinterest not sending traffic to your site?
Grab my free quick-start guide to set up your account, learn how to add your boards, create images and develop your strategy.
Why are images so important for Pinterest?
Let’s set the record straight. Pinterest is not a social media platform. It is a visual search engine.
That means people search – but rather than looking for phrases; they use the images to decide what to click on. Therefore, if your image does not appear to solve their problem, they will scroll on by.
You are also competing with millions of others. In fact, each month, Pinterest shows more than 2 billion pins to its users. That is a lot of competition.
Therefore, you need to make sure your image stands out in the sea of pins.
What does it mean when a pin goes viral?
A viral pin is one that is being shared again and again. You don’t pay to promote it. It is the image that pinners feel connects with them, and they want to share again and again.
To put a value on a viral pin means that it sends at least 2 – 3x the normal traffic to your site.
How much traffic will you get?
The truth is that the definition of viral varies from blog to blog. For example, if you normally receive 50 clicks a day from Pinterest, viral may mean 125 clicks in a single day. However, if your traffic is around 100 clicks a day, it may be closer to 250 for it to be considered viral.
The truth is viral is a moving target that does not include a single measurable figure. It will be different for everyone.
How to create pin-worthy images
There is no guarantee your Pinterest image will take off. None at all. And, anyone who promises they can guarantee it is lying to you. Don’t spend money to learn how to go viral, as that is a waste.
The truth is that viral pins, while not a guarantee, all have something in common. They use a proper image, text overlay, descriptions and are pinned to the right boards at the right time.
1. The image itself
Images are the most critical factor in creating a successful pin. It should grab the reader’s eye and draw them in. The image should convey an emotion or show the reader more what the pin is about.
If you are a recipe blogger, it is easy to do. You have pictures of exactly what your article is about. If it is a recipe for a cake, you have a picture of the cake.
The challenge comes for those who do not have a photo to use. What should use in this situation? The answer is simple – stock images.
Stock images are those you purchase to use on your site. Some design platforms such as PicMonkey or Canva, include options for their paying customers. You can find thousands of images to use for your pin.
When deciding on the image to use, you want to ensure it makes sense. For example, an image of a keyboard can be used for work from home content. If you see one with a piggy bank, it could work on a frugal post.
Make sure the image works and sends a clear message to the viewer to stop scrolling and read the text.
2. Text overlay
Not only should the image be captivating, but there should also be a clear text overlay that encourages readers to click.
It should tell the story without giving too much information away. You want them to want to click because they want to learn more!!
When it comes to adding text, there are a few rules to keep in mind:
Avoid script or handwritten fonts
These types of fonts may look pretty, but they are tough to read. Not only difficult for readers but also for Pinterest.
Yes. Pinterest.
The platform has a way to read the text on the pin image as well. It does not do as well with the script fonts. It simply can’t read them. Try to avoid them for your main words on the pin if possible.
Contrasting color and style
Your text needs to pop against the image. If your background is dark, you will want to use a lighter font, so it is easy to see and stands out.
If necessary, make sure you add a colored background behind the font, as that too can make it stand out.
Two fonts styles
To keep the pin interesting, consider using two complementary font styles. That can make the pin easy to read and the title pop, enticing the reader to click.
3. The Title
The title is where the magic happens.
Readers take less than 2 seconds to decide if they want to click or scroll by. That means your title needs to be intriguing and make the reader feel they need to click.
One mistake most people make when it comes to the text on the pin is that they think it must be exactly the same a the title of the article they link to. Nope. It does not.
In fact, the title used on a blog post will not work the same way on Pinterest. The reason is intent.
When someone searches via Google, they have a term they are looking for. They have intent. They want to click on something that is going to answer their question.
On Pinterest, they do not. They may search for a topic but look at all sorts of ideas as they scroll the feed. The ones that stand out make them wonder what they will learn or the mistakes they are making.
For example, your article may be titled How to Potty Train Your Three-Year-Old. That phrase may include the keywords you need to rank well on Google. But, that phrase is rather “boring” for a pin.
Try to change it up to say something such as “The #1 Mistake You are Making with Potty Training” or “The Secret to Potty Training in Three Days.” Those are the titles that will get people clicking.
4. Size matters
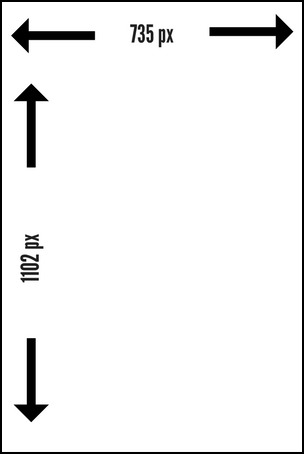
First off, the image needs to be vertical. Not sure. Not horizontal.
Pinterest has made it clear that they want images to be in a ratio of 2:3, which could be 735 x 1102, 1000 x 1500, or even 2000 x 3000. However, do not make the image any smaller than 600 x 900 (far too small for Pinterest).
But the thing is that this may not be the right-size graphic for your article. You can designate a pinnable image that will pull when someone clicks your pin button. You can do this with a social sharing icon, which you can use to select the pin you want to have pulled.
You can also add a smaller image to your site and make it non-pinnable. Then, add a second hidden image. That way, when someone clicks to pin, the proper image pulls for them.
Use a social sharing plugin
Use the Grow Social Pro Plugin. It allows you to upload different images for your various social media platforms.
You can have one sized for Facebook, Twitter, and Pinterest. Not only that, but if you pay for the pro version, you can add multiple images to your post, and they will all be hidden until someone clicks the share button!
You can also use the Tasty Pins plugin. It, too, allows you to designate a specific image(s) that should pull when someone clicks the button to pin something on your site.
How to manually make an image non-pinnable
If you do not want to use the plugin, you can actually hard code this on your site. It takes a few extra steps, but it is possible.
First of all, you want to turn off the Pinning ability on the image on your post. To do this, you will add in the code data-pin-nopin=”true” into the image on your site. You will enter this into the image code itself.
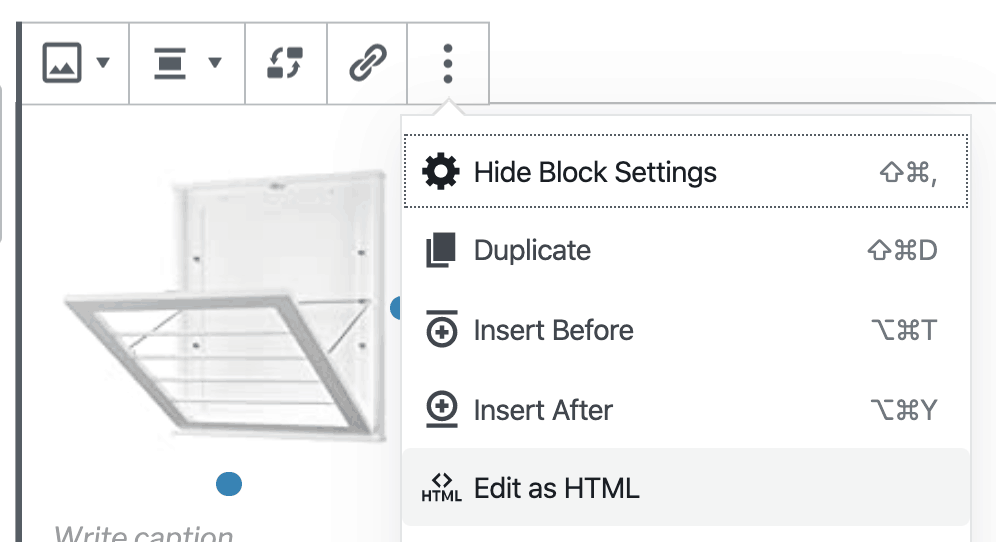
Here is how to do this on WordPress:
- Click on the three dots above the image and scroll down to find Edit in HTML
 or, if you use the Classic Editor, select Text from the dashboard:
- Find the code for your image. It will look something like this:
<img class=”aligncenter size-full wp-image-285″ src=”https://traciefobes.com/wp-content/uploads/2016/08/pinterest-image-size.jpg” alt=”Perfect Pinterest Image Size” width=”304″ height=”454″ /> - Enter the no pin code into the coding and then hit SAVE DRAFT before you switch back to Visual (otherwise, it may not save).
<img class=”aligncenter size-full wp-image-285″ src=”https://traciefobes.com/wp-content/uploads/2016/08/pinterest-image-size.jpg” alt=”Perfect Pinterest Image Size” data-pin-nopin=”true” width=”304″ height=”454″ />. - Now you have disabled the ability for that image to be pinned.
How to manually hide an image on WordPress
Now, you will want to add in the image you want to have pinned instead. Upload it as you would any other image (I always put this at the bottom of my post to find it). You will want to add the hidden code to the image.
Here is how you do this on WordPress:
- Click on the three dots above the image and scroll down to find Edit in HTMLor, if you use the Classic Editor, select Text from the dashboard:
- Find the code for your image. It will look something like this:
<img class=”aligncenter size-full wp-image-285″ src=”https://traciefobes.com/wp-content/uploads/2016/08/pinterest-image-size.jpg” alt=”Perfect Pinterest Image Size” width=”304″ height=”454″ /> - Enter the HIDE THIS UNTIL TIME TO PIN pin code into the coding. Do NOT toggle back to Visual editor, or you risk losing the coding.
<img class=”aligncenter size-full wp-image-285″ src=”https://traciefobes.com/wp-content/uploads/2016/08/pinterest-image-size.jpg” alt=”Perfect Pinterest Image Size” data-pin-description=”It is important to make your images the right size on Pinterest. Find out what size you NEED to make them so they get seen! #Pinterest #bloggingtips #PinterestImageSize width=”304″ height=”454″ />. - Now you have added a hidden pin to your post, so when someone clicks to pin, they have the image you want pinned!
If you have more than one image on your post, you may need to learn how to hide multiple images on Pinterest.
5. Use templates
Sometimes, trying to come up with the proper overlays and text styles is too much. Especially if you are not a graphic designer. That is where templates work.
You can purchase Pinterest Templates so all you need to do to quickly create a pin is upload your image and end the text. It makes pin design very, very easy.
The best part is that they are styles that work, so you won’t be left wondering if the design you created will look good in the smart feed.
6. Take a course to learn how to design pins
The truth is you are a writer, not a designer. And, while templates are an option, they are also used by a LOT of people, so you may not want to do the same thing as everyone else. You want to make your pins but are not sure how to do that.
You can take a Pinterest Design Course to learn how to make gorgeous pin designs. Making a small investment in learning how to get people clicking (and buying) will more than pay for itself over time.
How to get your pin to get shared by others
Once you’ve got that gorgeous pin, you will want to do all you can to get other people to want to click your pin and share it so more and more people will see it.
1. Repin your content more than once
Most viral content does not go viral the very first time you share it. It sometimes takes a few re-pins/shares before that happens. Such is the case with Pinterest.
You should continue to re-pin good content onto your boards. Doing so allows the pin to gain traction.
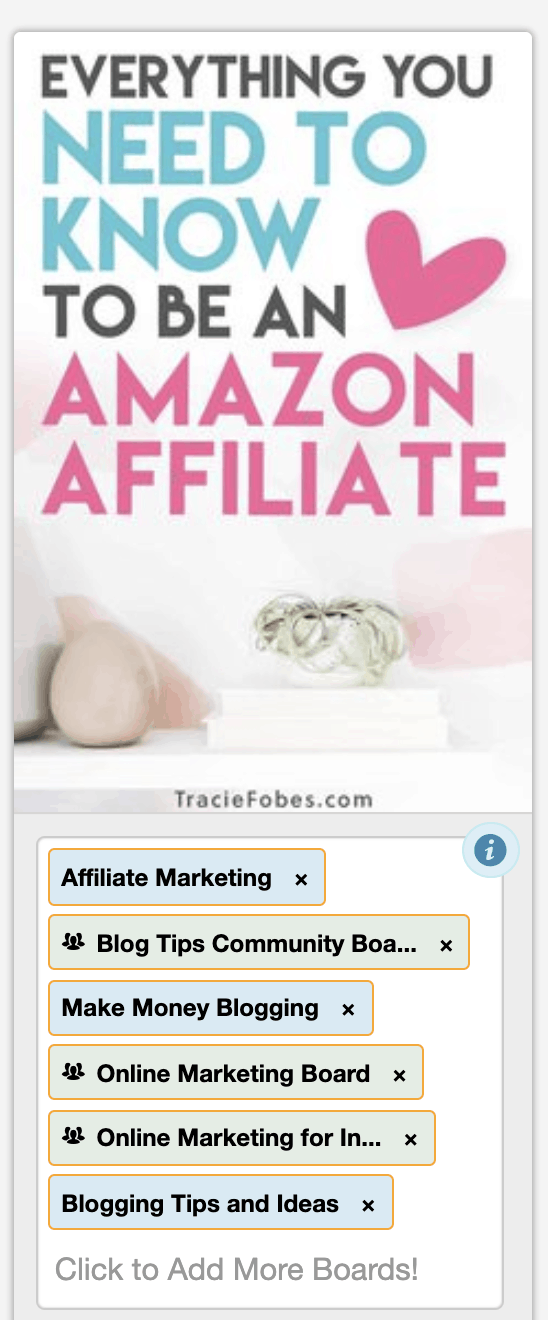
However, only pin it to your relevant boards. For instance, if you have a great Christmas Cookie recipe that the kids love to make, you should pin that to your Best of You Board, Christmas, Cookies, Kids, and holiday boards.
Your pins also do not need to be one and done. You can pin it more than once. However, do not share the same image to the same board more frequently than once every 4 – 5 months.
2. Pin your content to relevant boards
When you are pinning, it is essential that the board description match the pin. It is how you signal to Pinterest what the pin is about and how Pinterest should index it.
For example, pinning a beauty pin to a travel board is not a good idea. Pinterest will be confused about the pin. It will not know who it should be shown to.
Instead, come up with at least five relevant boards that every pin can live on. That way, you always have a place to add your pins regularly.
3. Pin timely
Another trick to helping your post go viral is to stay ahead of the curve when it comes to holidays and other events. By pinning your content around two months before each holiday, you give it time to gain traction and get pinned multiple times, hopefully going viral.
For example, pin Halloween content starting in August. You need to pin your Christmas content in October. If you plan on a round-up type of post for any of these holidays, the sooner you can start pinning (and continue to repin), the better.
4. Watch your analytics
Don’t look at Pinterest analytics. Dig into your Google Analytics so you can see which pins are sending you the most traffic.
These are the pins you want to pin on a recurring schedule. If they are already sending you traffic, you can keep the momentum going by pining that same content (see numbers 3 and 4 above).
You should also watch this for your past holiday posts. If the one you shared with Elf on the Shelf ideas did very well last November, start pinning it again this year – but in October.
5. Good keyword descriptions
When you upload your image, you will want to make sure that the “alt-text” wording is where you place your keyword descriptions. This is the default which is pulled onto the pin when shared by anyone who visits your site.
Ensuring that you have the right keywords is important because it will help your pins come up through search. Most people will not edit your descriptions, ensuring that what you want your pin to say will remain intact. For instance, you would not way “stuffed peppers.”
Instead, say, “An easy stuffed peppers recipe that you can make for dinner any night of the week. Simple stuffed peppers are a quick family recipe idea that everyone will love. #dinner #recipe.”
The second one contains many more of the keywords under which this pin will now be found.
BONUS TIP!!!
An additional way to really help your content gain traction by posting it multiple times is to use a scheduler.
When it comes to scheduling, you can do things to help those pins which have already gained momentum. There is a simple way to do this!
Tailwind
If you use this platform, you can set up the pin to be pinned to all of the boards you want with a few clicks of the mouse. Here is the simple way to schedule a pin via Tailwind.
- Find the pin you want to share.
- Click the Tailwind Schedule Button.
- Next, select all of the boards where you want this to be pinned. You can choose one, two, or even all of your boards (if they are applicable).
- Next, set your interval pinning time. This makes sure that you do not pin to any of your boards all at once. I usually recommend at least one day between pins.
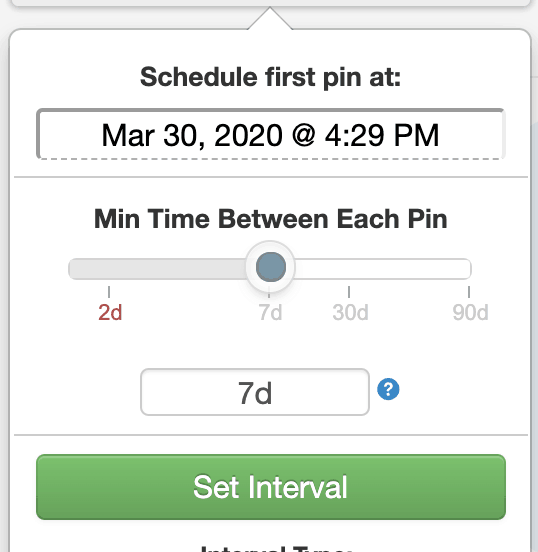
- Then, hit schedule and it is added to your schedule and will automatically pin to those boards for you.
Learn even more about using Tailwind and how to schedule your content on autopilot – even the content you’ve pinned before!!
There you’ve got it! The things you will need to do to try to help your pin take off and go viral! If you have had this happen for you, please let me know – I’d love to help give you a little more pinning love myself!
Pinterest not sending traffic to your site?
Grab my free quick-start guide to set up your account, learn how to add your boards, create images and develop your strategy.

How do I enable “rich pins”?
Hi there Charlotte! Rather than me tell you step by step, you can check out this simple tutorial from Pinterest.
https://business.pinterest.com/en/rich-pins
I was wondering about many of the things yo addresses in this post. You have cleared a few things up. Thanks for the great tips!
I am so glad I could help!
Hello! I recently had a pin of mine go viral and I was extremely excited. It has been almost two weeks since and I’m still getting lots of traffic from the one post. I’m trying to figure out how to make it happen again 🙂 Great advice, thanks!
Congrats! That viral pin is a great feeling, isn’t it?! I hope you can have it happen again soon!
Hi Tracie! So if I buy Social Warfare and it’s installed – if someone pins my picture – it will automatically resize the image for that platform? Is that right and it will resize for the other platforms right? I wanted to make sure I understood.
Thanks, Kelly
Kelly,
You will actually create different sized images for the different social media platforms and upload that image to that platform. So, you can have one size on your blog and then one for Pinterest. When they go to pin, the image which pulls will be the one you have in your plugin.
Thank you! That makes it clear…
Thanks for sharing all that information! I didn’t realize there were so many things you could do to affect your pin rates!
You are so welcome! And it is crazy, isn’t it?!
Great info! I found the tip on when to pin seasonal content especially helpful. Thanks for sharing!
Glad that you were able to pick up some tips!
Hi Tracie! I didn’t realize I should keep pinning and repining my own pin to my boards. Doesn’t that get to be pin overload? Or, how often should I do it?
One more question – how often would you post the same pin to a group board?
Thanks!
It does not cause overload because you are also going to continue to pin other people’s content to your own boards as well. I try to wait at least 3 – 4 weeks before pinning something to the same board once again. That way, the other prior pin is further down on the board and it does not look spammy.
As far as the group boards, there are sometimes rules. Some may so no duplicate pins ever, others once a month. So, make sure you follow that. If no rules, I still try to wait 3 – 4 weeks before pinning something again.
Thank you!! One woman told me to wait 3 months and that seemed excessive.
Kristin 🙂
Hi Tracie,
Thanks for the very informative post! I just started my blog a few months ago and one of my pins just went viral I I had to hurry up and create an email opt in to start collecting emails. ????. I Did you use proper title and SEO for Google and Pinterest. I repinned it a few times and shared it on tailwind. Then I did nothing for two weeks. I guess you never know when it could happen-But if anyone is reading this make sure you are prepared if it does!
That is the beauty of the viral pin (or the annoyance). You just never know! That is why you always want to put your best foot forward.
Hey. I am just starting to try and leverage Pinterest. This was definitely helpful!
Happy to hear that!!
great post, i like this ..
Hi! I’ve been doing Pinterest marketing for 6 months with only minimal results. I found point 2 particularly interesting. I didn’t know that the older pins need to be repinned to the boards at regular intervals. I will try that now. Is there any recommended time gap between pinning to board twice,
You will want to repin those pins every 4 – 5 months onto the same boards. Pinterest loves fresh content but that does not mean you should not pin your existing images more than once.
Now, I Knot That Pinterest Is Good Enough for our blog. With the right PIN we can make our blog post being viral. Pinterst is one of the useful social media that can increase our traffic
Yep – a proper pinnable image is key to getting more traffic from Pinterest.
This was so helpful! I liked what you said about creating image titles with intent and that they don’t need to be the same as the actual title of the article. This is so true. For example if you are comparing these two titles ‘ Why It’s Ok To Be On Your Own’ Vs ‘8 Reasons Why It’s Ok To Be On Your Own’ the latter would most likely generate more clicks because it has a number in the title.
I am so glad it was helpful! The more we can do to make those clickable titles the more traffic we will see!