
This post may contain affiliate links. That means if you click and buy, I may receive a small commission (at zero cost to you). Please see my full disclosure policy for details.
Creating multiple pins is one smart trick to get more content to share on Pinterest. Most Pinterest books and courses recommend doing this so you have more content to share.
Not only that, but readers can decide which pin image they want to share. You never know what will resonate with them and end up going viral.
But then comes the next question: “How do you hide a pinnable image on WordPress?”
You need to add 2, 3 — or more pinnable images to your blog post. And, as necessary as that is for Pinterest, you don’t want them all to be visible. You’d rather hide your pin images so they don’t all show at the bottom of your article.
A quick search for “how to hide a pin” will serve several results. Sadly, several show outdated practices, and even more do not teach you how to do this if you use Gutenberg.
Let’s go through the methods you can use to add two, three, or even five images to your blog post.
Struggling to know what to focus on with your blog?
What to focus on, and the mistakes to avoid making, to turn your blog from a hobby into a business.
Quick Navigation
How to Hide Pinnable Images on Your Blog Post
Why should I hide pins?
If you are new to using Pinterest, you may wonder why anyone would want to hide an image on their site? Why not put it out there for everyone to see?
You could do that, but if you have four or five images, they can clutter the end of the post. It also takes time for the page to load, affecting site speed.
A single image on your post makes for a better user experience and focuses the reader’s attention on your content – which is what you want.
Does the image need to be visible on my site for Pinterest to see it?
There is a myth floating around regarding hiding pins and Pinterest needing to see it on your site. That’s not true. What matters is that the pin relates to the content.
Yep!
Even if you find a stolen pin that is yours and the image is hidden, you can report it. The image’s visibility on your post has little to do with ranking, search, or reporting stolen content to Pinterest.
Is there a wrong way to hide a pin?
You may have also heard that if you use the wrong code, Google will not be happy. Well, yes and no. Let’s talk first about what the code looks like:
<display:none>
Google may not like this because you are using code to hide something on your site. Many spammy sites use it, which is why it is not the best option.
The site also has to pull every image when the page loads (even if it is hidden). That, in turn, can make the site load much more slowly.
However, it is OK to use it in the way shared below as it will work (and even Pinterest and ad networks agree that it is acceptable). But, you will want to use the awesome hack below to get it to work the best possible way on your site.
The truth is that most bloggers will be OK if they use this code. However, that does not mean you should.
Instead of making hard work for yourself, let’s discuss the simplest ways to hide a pin. Don’t worry; you can do this even if you aren’t a WordPress coder.
What is the hidden pin code bloggers should use?
Pinterest has shared the code that they love the most. And, if Pinterest happens to enlighten us on best practices, it makes sense that we should listen.
The code is “data-pin-media.” You can use this if you have an image you want to be pinned that is different than the one on your site.
Before I show you how to do this, let’s talk about a couple of examples of when you would use this code.
If you have a smaller version of the pin on your post
When adding images to your site, you must upload them the size you want them to be rather than force your site to scale them up or down. For example, if your pin is 1000×1500, it may be too large to show on your post. Instead, you want it to be 467×700.
You should not change the image size on your blog post once added, as every time the page loads, WordPress has to go to work adjusting the size. That could potentially affect how your site loads.
Create two pinnable images for your site: one is for your blog post, and the other is for pinning. You will add them both to your post and use the code below to hide the larger one, so it pulls only when a user clicks to share a post.
You have a different image for Pinterest
There may be instances where you have a featured image on your site and do not want to display a pinnable image. However, if a reader hits the pin button, you want the proper one to pull.
You can add and hide the pinnable image on your post, so no one sees it displayed but is ready for sharing.
Pull larger (or a different image) to be pinnable on Pinterest
The first option is where you have a smaller image embedded into your post or even an image you don’t want on Pinterest but have a version you want to show when the Pinterest share button is clicked. You must upload both images to your media library and combine the code.
Step 1 – Upload both the smaller and larger images to your media library. (It may be helpful to add the image size to the end of the file name for the larger one, so you know what you are doing).
Step 2 – Add the pinnable image to your blog post.
Step 3 – Hover over the image for the menu to show and select the three dots at the end. Then, choose Edit as HTML
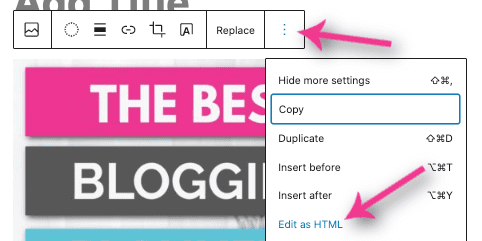
You should see a code that looks something like this:

Step 5 – Add the code to make the new image pull when someone clicks your pin share button.
The code is: data-pin-media=”URL of Pinterest image” inside of the code. (Note that you will need to open another window for your dashboard and your media file to copy the URL for the additional image).
You’ll see this below, as highlighted in pink.

NOTE: You will see an error pops up as you finish the code — and this is OK. It looks like this:

It lets you know that code was added to the block that may not need to be there. Do NOT click the blue Attempt Block Recovery button.
Instead, click the three dots at the end of the row and select Convert to HTML.
That saves the code you’ve added and will show HTML on your dashboard rather than the image. This is OK; the post will be normal once you publish it.

The correct image will pull for you when the Pinterest button is clicked on your site!
Code to Hide a Pinnable Image on Your Blog Post
You may want to add several pinnable image options to your blog post. That way, when the user clicks the button to pin, they can decide which image to use.
Rather than upload several large images and have them inside your post (even with hidden code), you will use an image marker. Doing so will ensure your site speed is not negatively affected.
Step 1 – Pop over to Canva and create an icon image sized 100 x 200. You can make it any color you want, as it is only a marker we will use to attach your pinnable image. However, it must be this size as Pinterest cannot recognize a smaller image. (Note, you will create this image only once).
I made the image white in this example and added a pin border (so you can see it). The file name I used was “Pin Marker.” I can easily find and use it on all blog posts.

Step 2 – Go into your blog post and add an image block at the end of the article. Find the Pin Marker and add that image.
Step 3 – Hover over the image to see the menu. Click the three dots at the end of the row and then Edit as HTML.
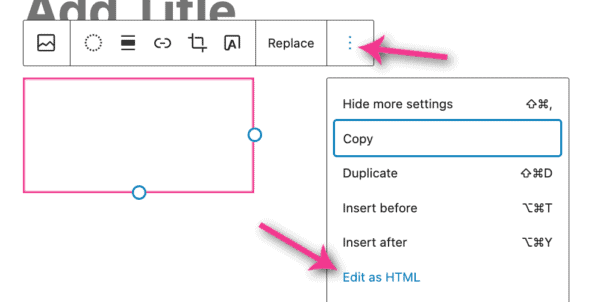
Step 4 – Add the codes to hide the image and pull the image you want to be pinned.
To hide the image, add this code before all the other code: <div style=”display:none;”>. Then, add the closing code at the end of your coding block: </div>.
You will need to copy the URL for the image you want to pull onto Pinterest (open another window and access your dashboard to upload and grab that URL.
It will look like this: data-pin-media: “URL for pinnable image. “You will paste that inside of your image code.
See the sections below in pink to see where to add these codes:

You will see an error from Gutenbery asking you to recover the block. Don’t click the blue button.

Instead, select the three dots at the end of the box and choose Convert to HTML. Now, you will see the code in your blog post rather than an image, which is OK as it will be hidden on the post but can still be pinned when you click the sharing button.
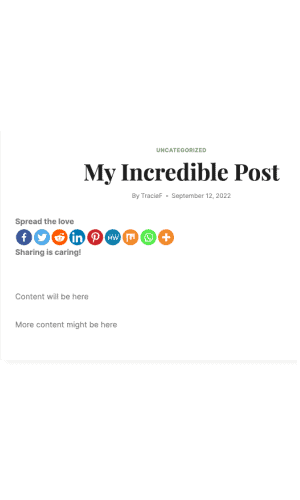
You will see that this post shows no image, but it appears when the Pin button is clicked.
If you have more than one image to hide, you will add the Pin Marker and each image as needed.

Use a plugin to hide pins
The simplest way to hide a pin is to use a plugin. While you don’t want to use too many plugins (or, even worse, the wrong ones), a well-coded plugin can have multiple features making it a better option than adding several plugins.
The one I recommend is Grow by MediaVine. This plugin will do many things on your site, including:
- Add sharing buttons
- Track share counts
- Link to your social accounts
- Add the proper pin description
- Make images non-pinnable
- Allow you to add multiple hidden images to your blog post
Even though it does a lot, it is still well-written, so it is not heavy and should have no bearing on site speed. But, you need to pay for the pro version if you want all the bells and whistles ($34 a year).
Once you add the plugin to your site, you will activate it (the developer will show you how). Then, you need to ensure it is set up correctly for Pinterest.
First, find the plugin in the dashboard. Navigate to Grow > Settings > Pinterest Settings.
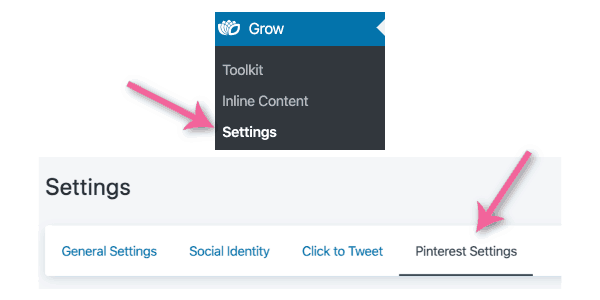
Now, let’s configure the settings, so you get everything out of the plugin and enable every feature they offer.
Pinterest Description Source: Set to Post Custom Pinterest Description (the alt text is not what to use as that is for Google – not Pinterest)
Pinnable Images: Only the Pinterest Images Set OR Images from the Post. I recommend you set the images for the most control over what is pinnable and what is not.
Pinterest Button Behavior: Set to Show Selection of Pinnable Images
Add Post Pinterest Image as Hidden: Toggle on so that all images you add here will be available for pinning.
Multiple Hidden Pinterest Images: Toggle on so you can add more than one picture to a post
Make sure you save your changes!
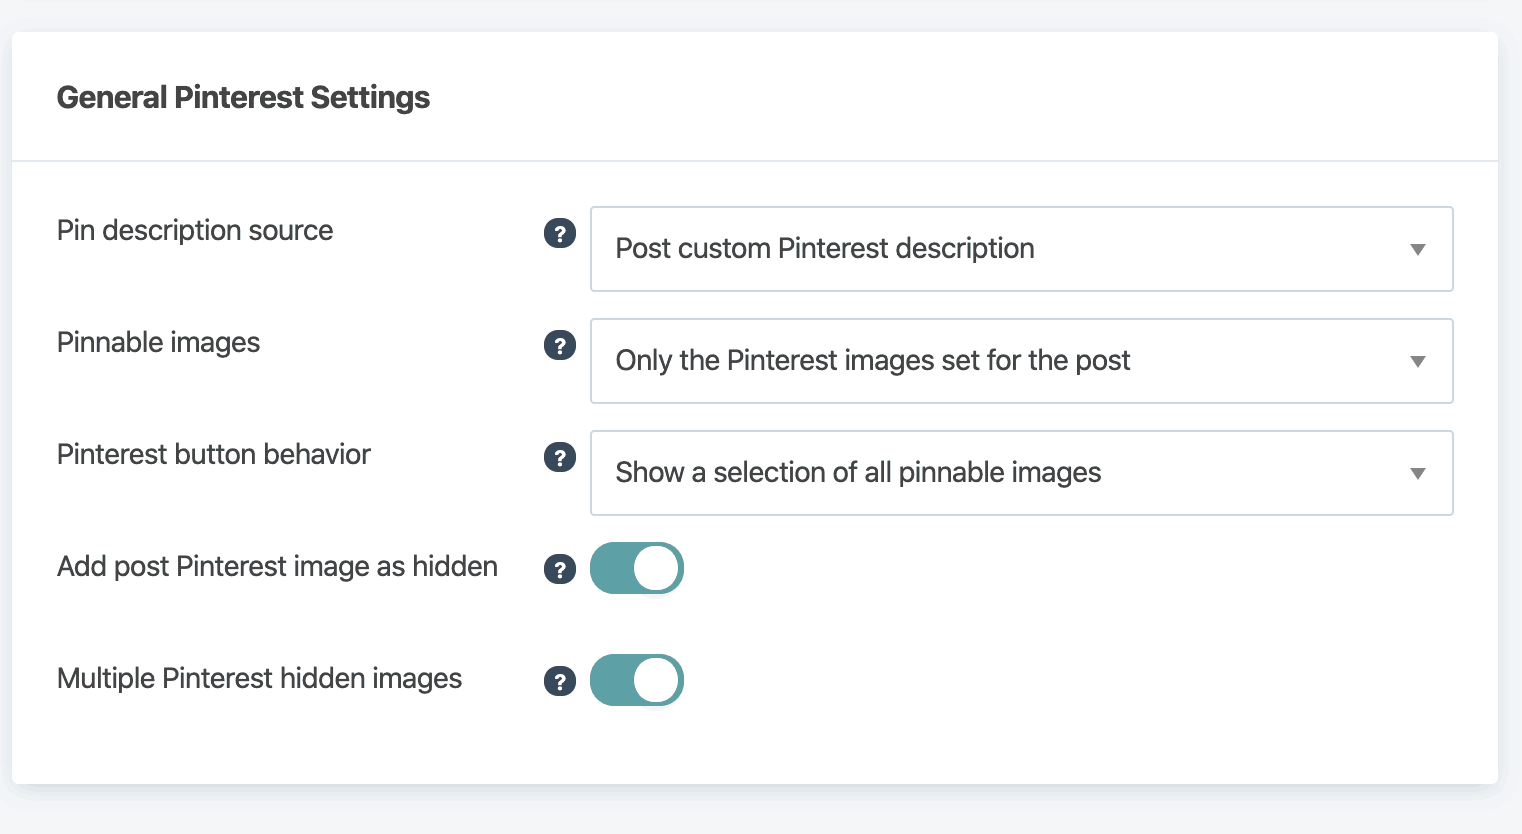
Next, you can add multiple images to your post and hide those you want! Let’s show you how to do that.
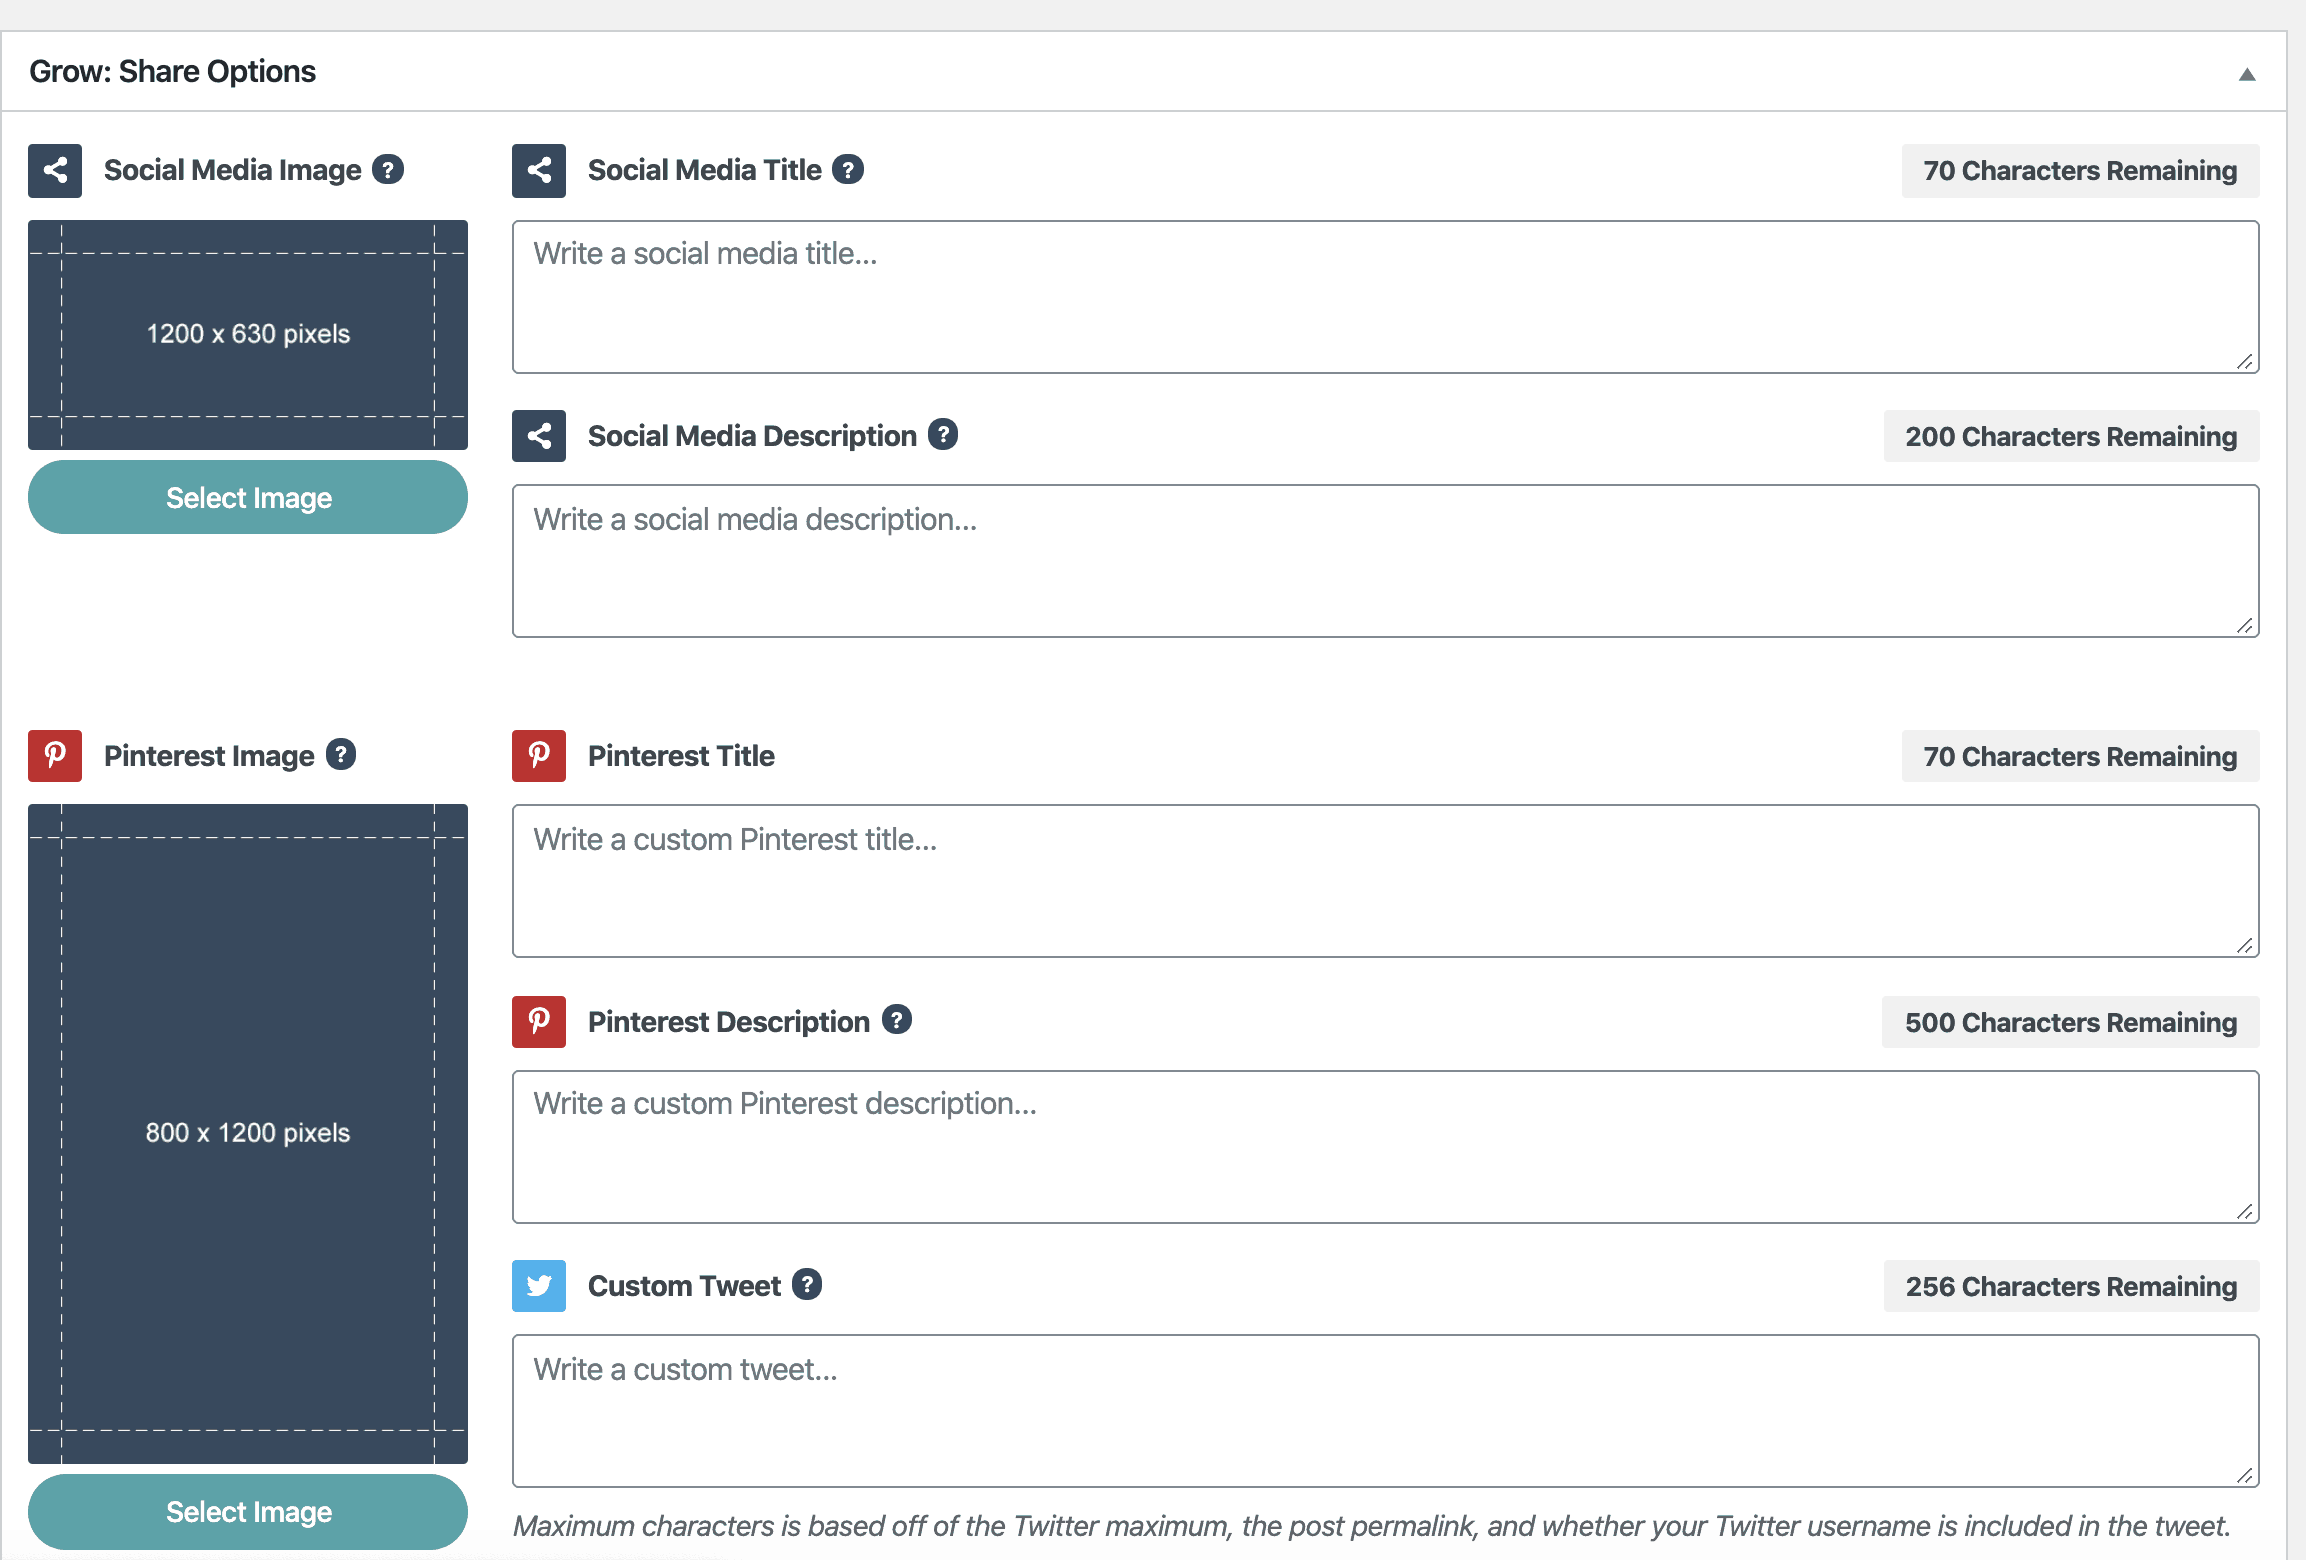
Write the post and create the images you want to use for Pinterest, as usual. Scroll down to Grow Share Options and click on the black Pinterest banner to add a pin image.
Update the title and description as needed. Then, scroll down, and beneath Pinterest, you will see boxes where you can add additional images. Click to add the images you want.
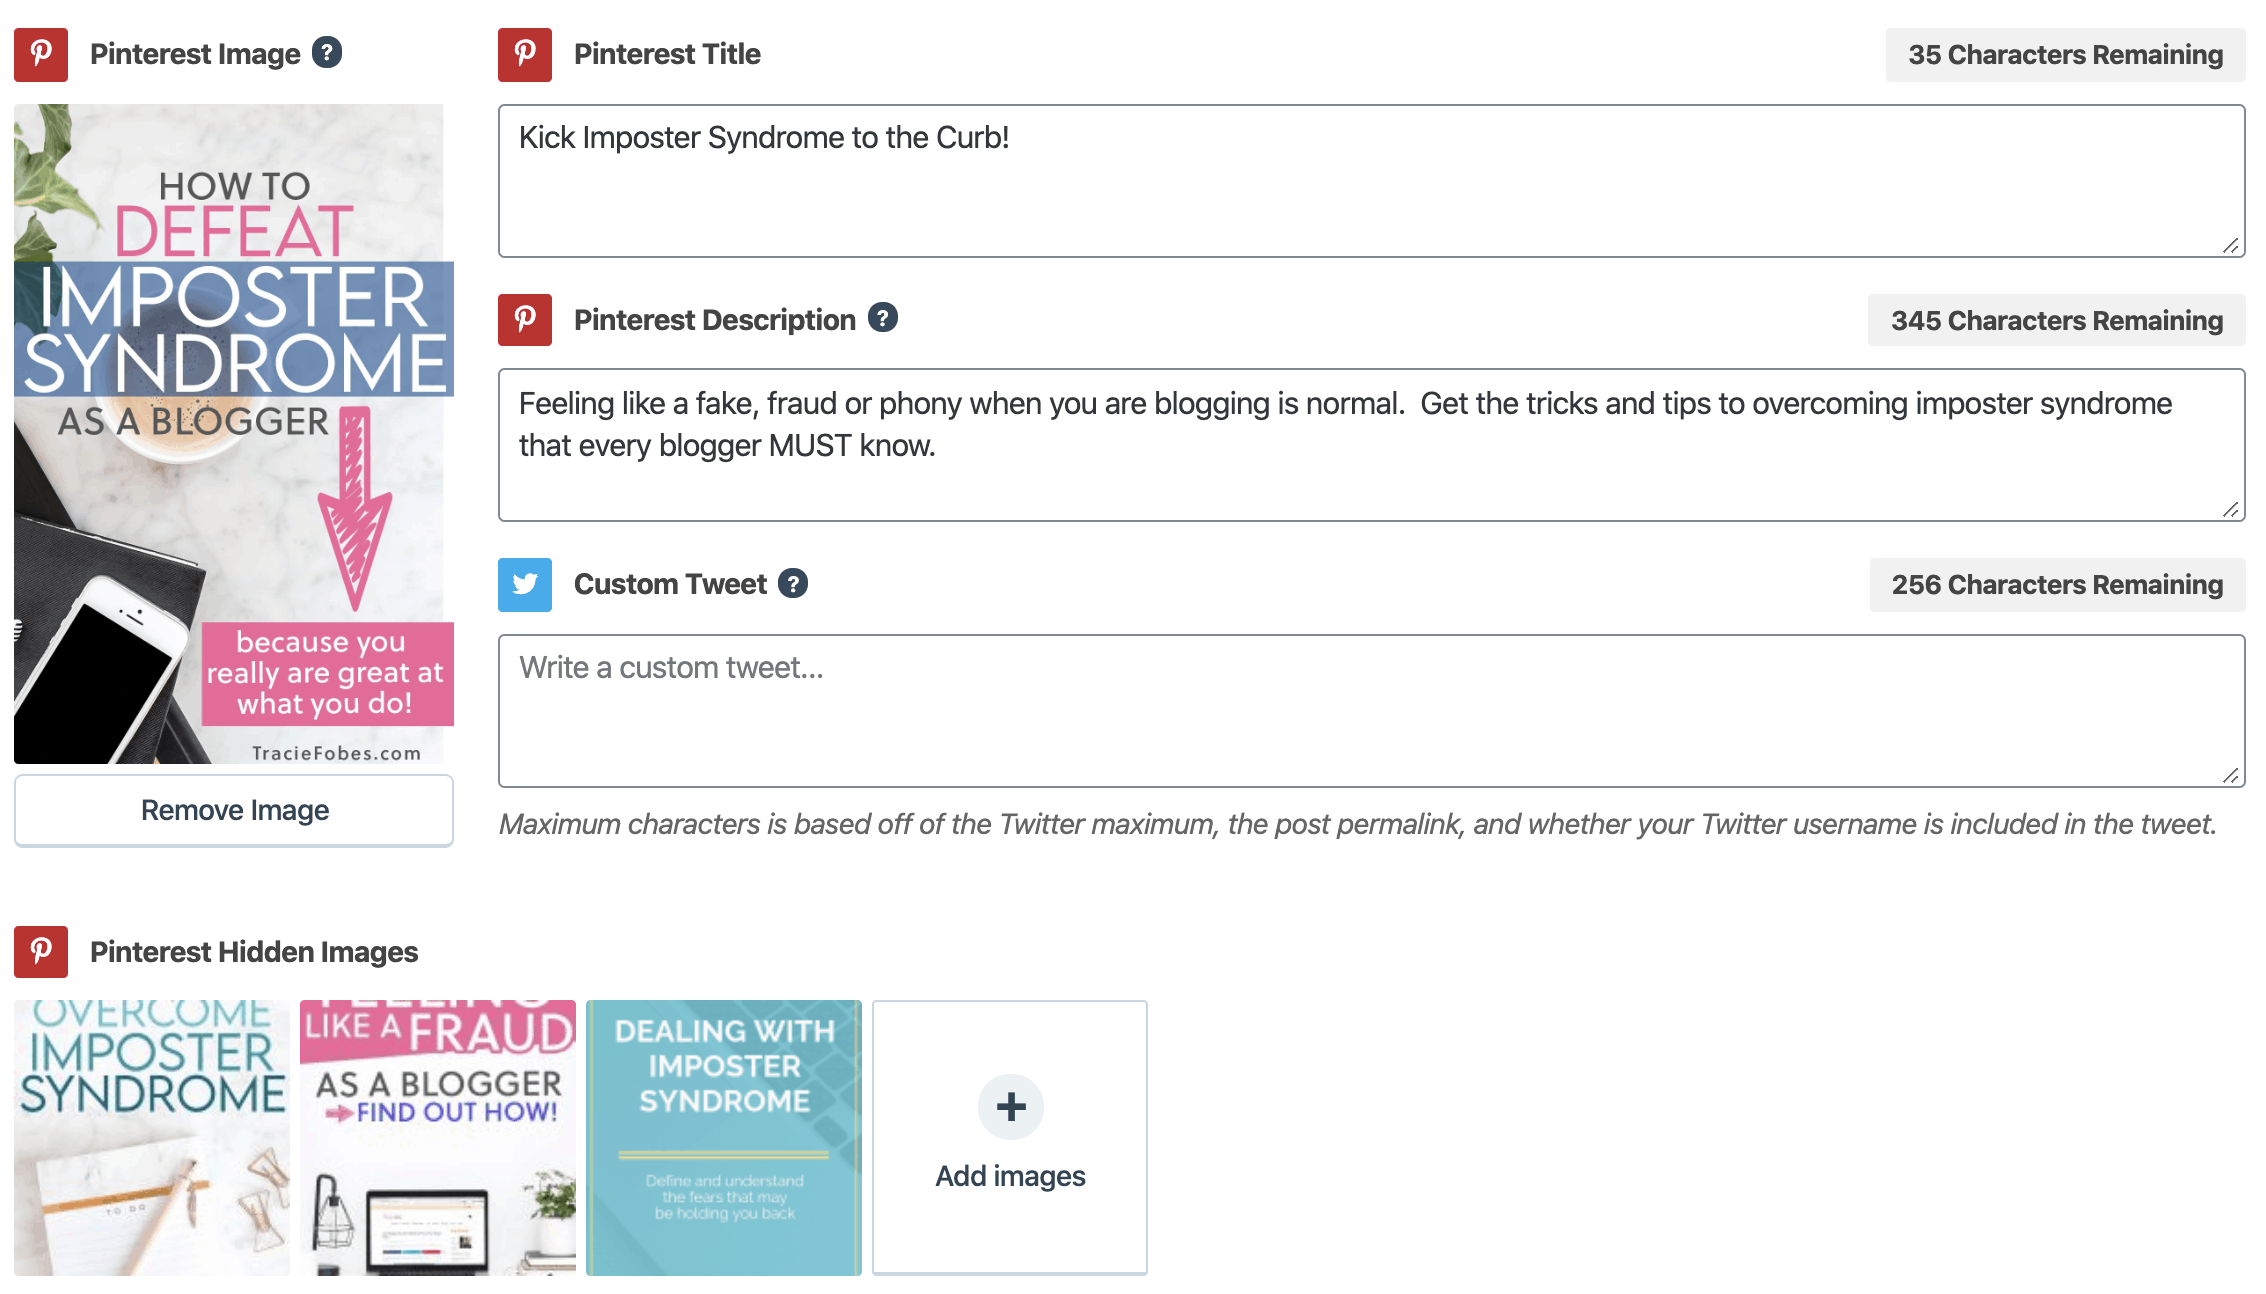
This is how it may look. You can see I have four images for this blog post.
When the user clicks the pin button on my site, they see this and can save whichever image they want!
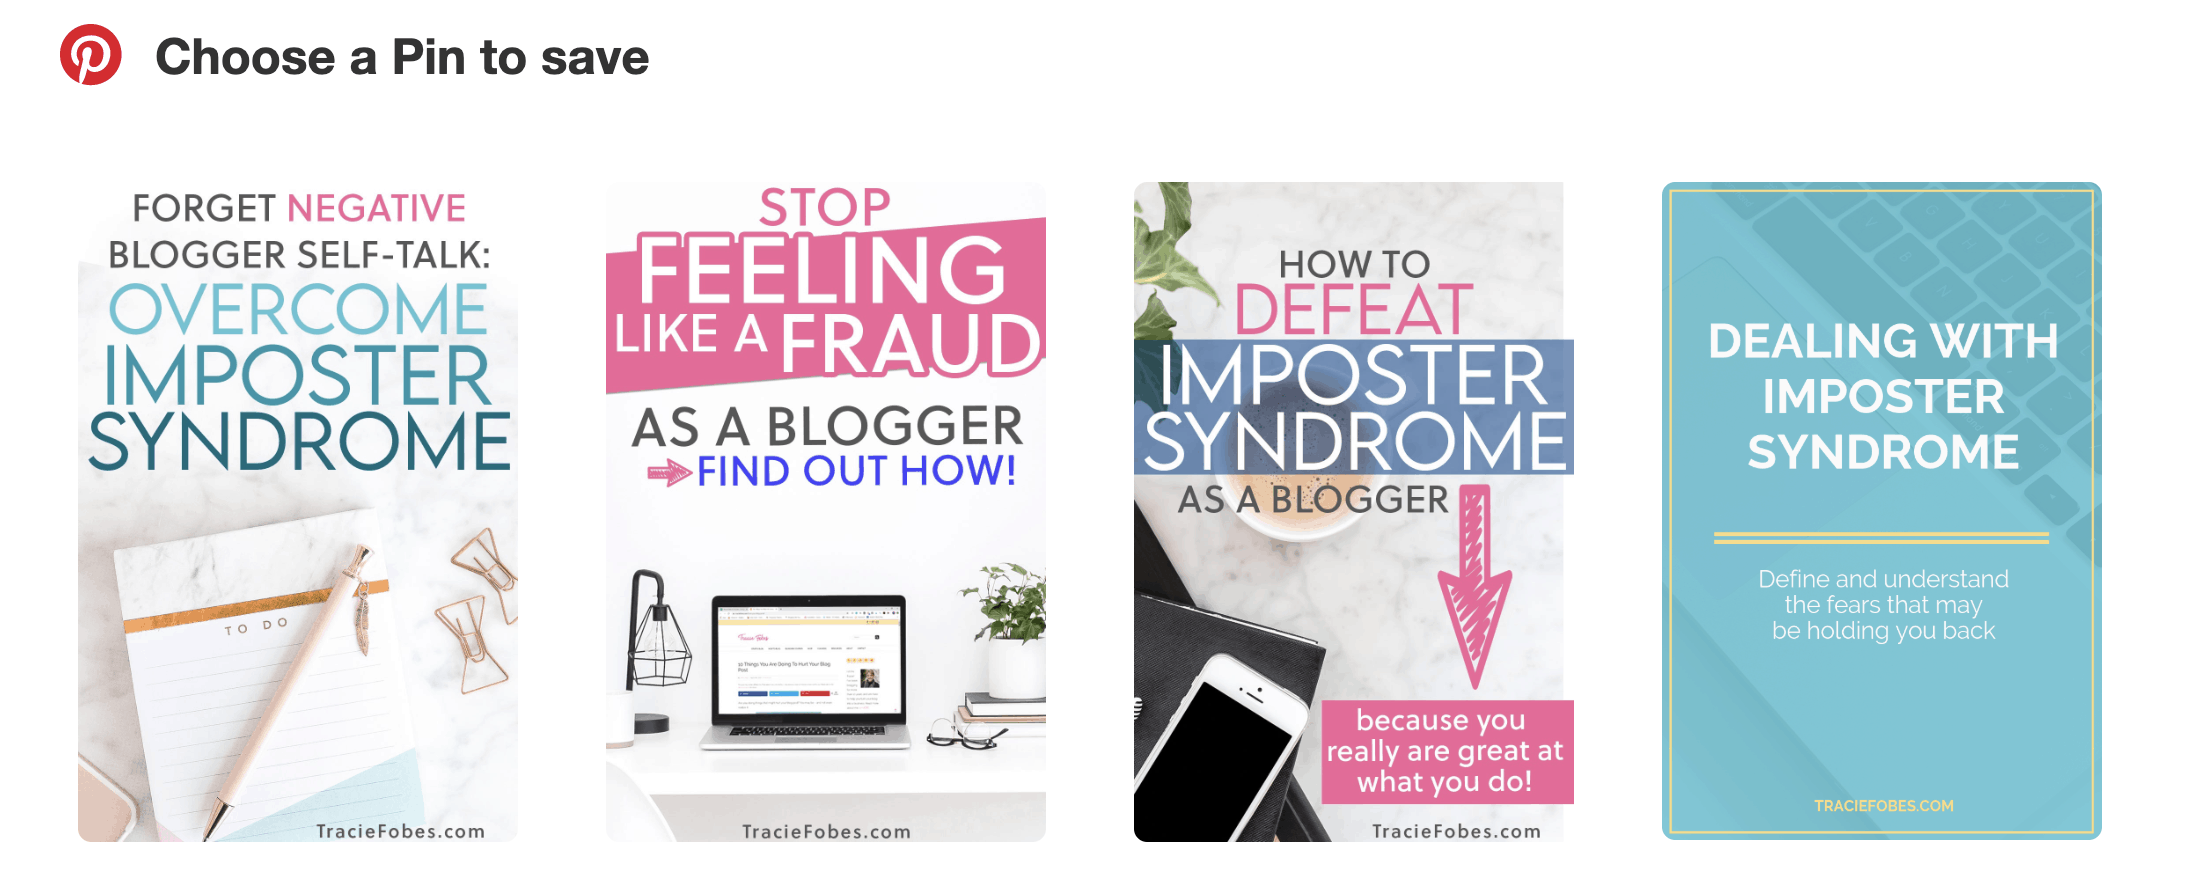
Grow by MediaVine covers all your hidden and multiple pin needs.
Can you make an image non-pinnable?
If you ask some bloggers, they say they want readers to be able to pin any image from their site. But do you want someone to pin an image of your face or that small screenshot or image you used in the post? More than likely not.
You make any image non-pinnable by using a plugin or manually coding.
Use a plugin
If you are using Grow by MediaVine on your site, you can add the no-pin code to any image you add to your blog post. The only thing is that this is a feature limited to paid customers. If you are on the free version, scroll down to find out how to add the code manually.
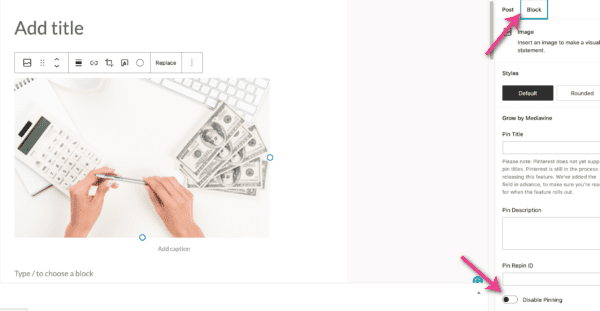
To make any image non-pinnable, find the image on your blog post. Then, click the Block icon in the sidebar. Scroll down and toggle on Disable Pinning (it will turn blue).
The image cannot be pinned when clicked on the Pinterest share button.
Manually add the no-pin code
Even if you have the plugin, there are images on which you will need to add the code manually. One example is your header or an image you’ve added to a widget.
You can’t disable pinning there (unless you know how to dig into CSS – and we don’t want to go there).
It is straightforward to add the no-pin code to any image — as long as you can view the HTML format. The code is: data-pin-nopin=”true”.
Now, let’s show you how to do this on your images. You will use this same code on images on your site through widgets* – -anywhere you have an image added, you do not want to be available for pinning.
*Note, you can not edit this if you use the image widget. If you need to make your image non-pinnable, you will need to use text code to make the image non-pinnable.
The code will look like this (see code in pink):

Now, one thing to keep in mind is that your featured image may still be pinnable. If you want to disable that, you will need to check with the theme developer or a qualified IT professional to make this adjustment.
NOTE TO GUTENBERG USERS: Once you add the code, you will get an error asking you to resolve the code. Click the HTML button, and you should be set.
There you go! The smart way to hide your pinnable images and add multiple pinnable images to a single blog post!

Struggling to know what to focus on with your blog?
What to focus on, and the mistakes to avoid making, to turn your blog from a hobby into a business.






This is awesome! Thank you Tracie for this post. Very helpful. And easy to follow.
Yeah! I an thrilled to hear that.
that’s great
finallu i got this secret
Wahoo!!!
Thank you so much for such an informative post! It’s just what I was looking for!
Glad that it was helpful!
Thanks so much for this Tracie – very helpful! I do have one question – is there any way to bulk select pictures in a post to be unpinnable?
Unfortunately, no. There is not.
Hi Tracie! I tried adjusting the code in the classic editor. Everything seemed to work great and the Pinterest image became hidden, but then when I tried to preview the post and used the pin it button on my browser, that pin did not show up. Do you know what I am doing wrong? Thank you for your help!
Pinterest has made some changes lately and so this post needs to be adjusted accordingly. Trying to resolve the issues now and see if I can’t get them to work with new formatting (gotta love all those changes).
Okay, thank you so much! Yes, changes add a whole new level of difficulty to things. I look forward to hearing what you find!
Thank you for this! I used to use Grow but it got too glitchy on my sites (possibly compatibility with other stuff I have on them.) I then started to use Snap Social which is great too but am testing out Kadence simple share on one of my blogs for fast loading and ease. I am not one who needs the API loading for share counts. But Kadence simple share doesn’t give the option to put pins in to share, ugh… I don’t like having any of my pins in the post so working on adding the code now!
Glad to help!!!