This post may contain affiliate links. That means if you click and buy, I may receive a small commission (at zero cost to you). Please see my full disclosure policy for details.
If you are not yet using Pinterest as one of your social media platforms, you need to. Why?
With more than 250,000,000 annual visitors, Pinterest is one of the fastest-growing platforms. Smart bloggers know they need to start using Pinterest to drive some traffic to their sites.
When most people think of Pinterest, they figure that they don’t belong. After all, it is a site filled with fashion, beauty, recipes, and crafts. While there is a lot of this on the site, it is so much more than this.
Pinterest is a visual search engine. Users visit the platform to learn about everything from how to core an apple to how to get a zipper unstuck. They look for tips on saving money, parenting ideas, travel tips ….. and so much more.
Pinterest not sending traffic to your site?
Grab my free quick-start guide to set up your account, learn how to add your boards, create images and develop your strategy.
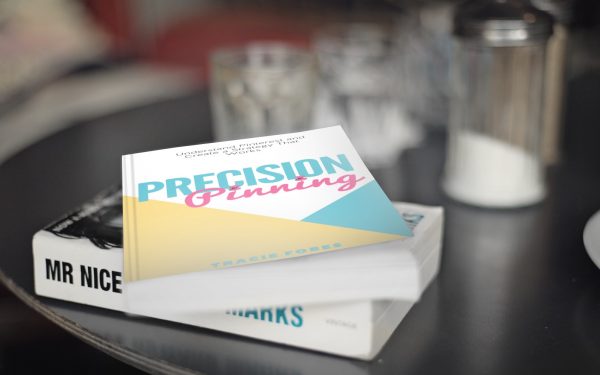
As with any new platform, there are right and wrong things you can do. The best way to get started with Pinterest is to understand pinning strategies. The book Precision Pinning is a helpful guide that has helped countless people learn how to use Pinterest to send massive traffic to their websites.
HOW TO GET STARTED USING PINTEREST
1. Create your account
Visit Pinterest and get signed up. You shouldn’t sync with your Facebook account, but rather, create an actual login via e-mail and password. That way, if something happens with your Facebook login, your Pinterest account is not negatively affected.
Since you are using this for your business, you need to create a business account. Instead of entering your name, age, and gender, click on the Create Business Account link.

It will pull in your e-mail and password for you. You will need to enter the details for the remainder of the questions.
Once created, you can select categories to add to your feed. Select those topics you feel would best connect to your site and brand.
2. Set up your Pinterest profile
When you create your account, you need to make sure that your description tells not only who you are but also what you can provide to the reader. This way, when they visit you, they know right away what they can learn from you.
Not only does this help educate the reader, but it also helps you get found through search. Users can search for pins, boards, and even pinners. Having a well-written description with strong keywords will be paramount to being discovered and growing your presence.
To change/create your profile look at the main menu at the top of the site. There will be three dots at the very end. Click on this to expand it and then select settings.
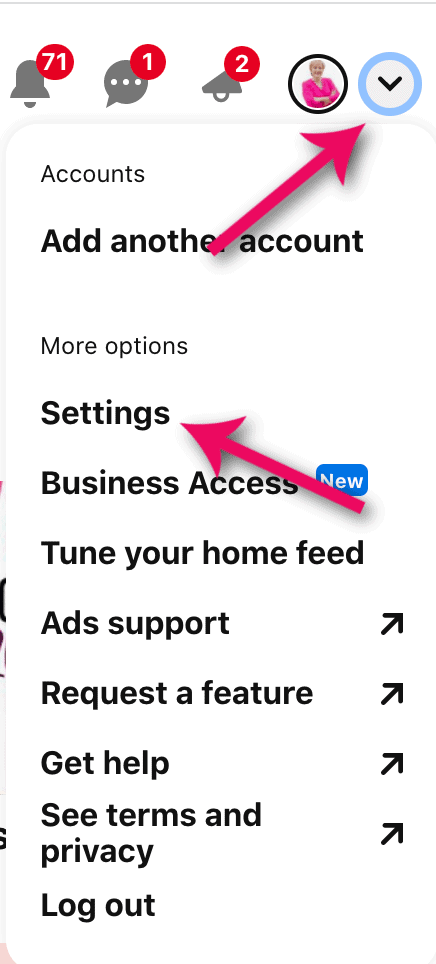
You will find that you can now edit all of the settings on your account. Go through each section and update them as needed.
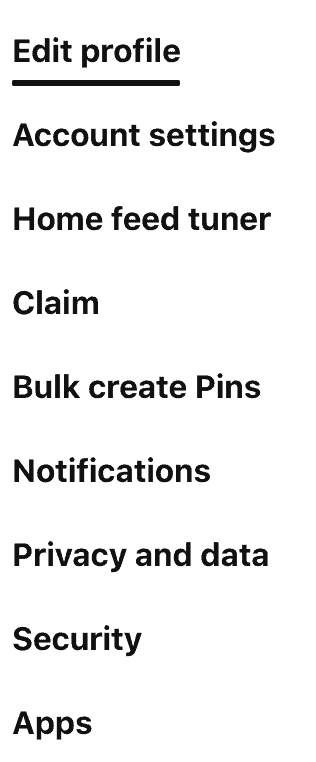
ACCOUNT SETTINGS
In this section, update your e-mail, name, and login details. You should not fill in the phone number and address sections (unless you are a local business and need people to find you).
CLAIM
You must claim your account. This is how you get the stats for the pins from your website.
Click the claim button. Enter your URL into the box and select claim. You will get a code that you will need to enter on your site.

To add the code, you can follow this simple guide from Pinterest. You can also install the Headers & Footers plugin and add it there. Once you are done, you will see that your site has been claimed, as there will be a green checkbox next to your site name.

You can claim select related social accounts as well. Add those you use (but realize that it is not mandatory to use Pinterest).
3. Create your boards
Boards are where you pin your content and the content of others. Look at boards like folders. You will have boards for each type of pin you will share in your profile. The very first board in your profile should be your Best of Me board. Call it that. For instance, the first board on my profile is The Best of Tracie Fobes.
The board’s description also includes the keywords and details that tell readers what they will find pinned on that board. When creating the title for your board, avoid “cutesy” names as those are not terms for which people will search.
For example, don’t call your board “Easy Peasy Dinners.” Instead, call it “Easy Dinner Recipes.” People will not search for easy peasy, but they will search for easy dinner recipes. Doing so can instantly bring your board to the top of the search list.
To start, you will want to have at least 10 – 15 boards. That gives your readers a good portfolio of content and a reason to follow you. Let’s say you blog about homeschooling. You could add boards such as preschool, grade school, high school, education, discipline, etc. (of course, with proper board names and descriptions).
Look at the pinners you follow and see what they are doing. You do not want to copy them, of course, but you can get inspiration from what they are doing to help you develop your boards.
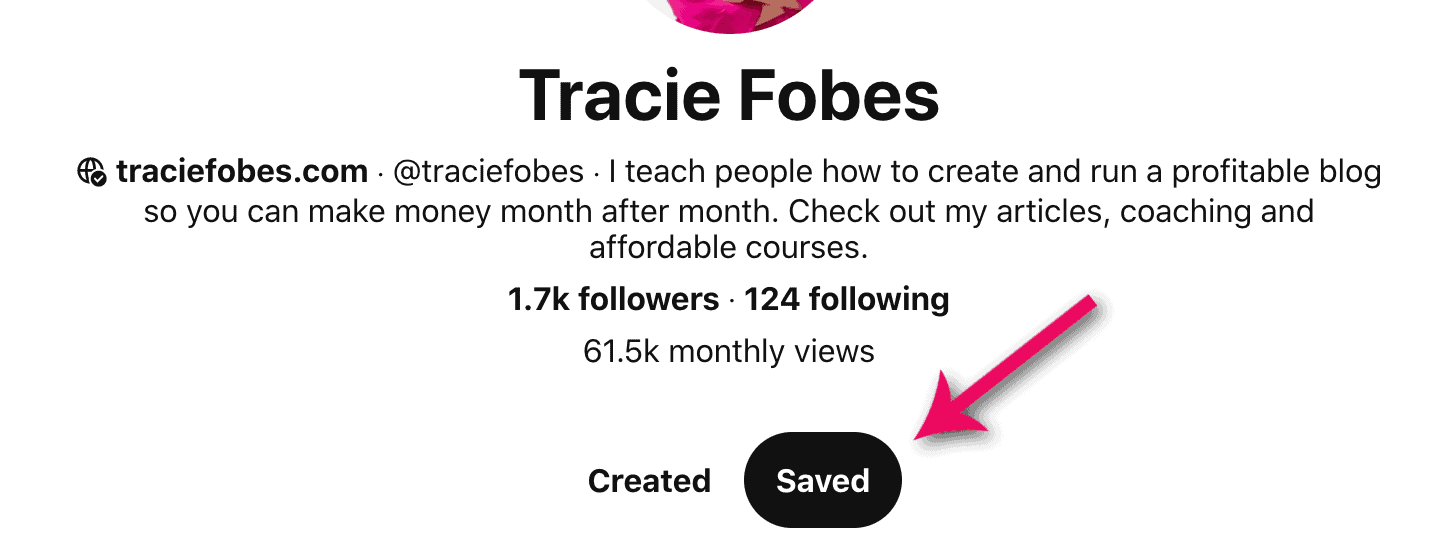
To create a board, visit your profile and click on the Create directly under your name.
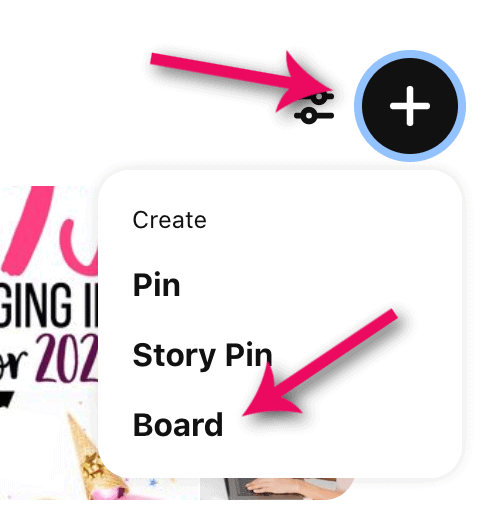
Look at the end of the first row, directly above your pins and you will find a “+” icon. Click on this and select Board from the drop-down.
4. Images
They matter. And they matter a lot. You must have a good, high-quality image on your pins. They should tell a quick story as to what they will learn in your article. Also, adding text overlay with your title will finish telling the story. Look at these two examples.

You can see on the first one; we know nothing about the post. The image tells me nothing. However, if you notice, the second image tells me what I need to know. The image shows me a clean space, which works well with the title. I would click on the second image much more often so I could learn more about it.
The image is more than what you see – it is also the text overlay. Readers need to know what the post will teach them by merely looking at the image. You will want to learn how to make pinnable images or consider purchasing Pinterest templates.
If you can’t take photos, for whatever reason, you can purchase quality images from reputable stock sites such as depositphotos.com and 123rf.com.
5. Pin Descriptions
When you upload the pin to your site, you want to ensure that the proper description pulls when it is pinned onto Pinterest. Your description should include keywords that people search for on Pinterest.
A simple trick to find the right Pinterest keywords is to use the search tool yourself. Go onto the home page and type in any phrase for your post.
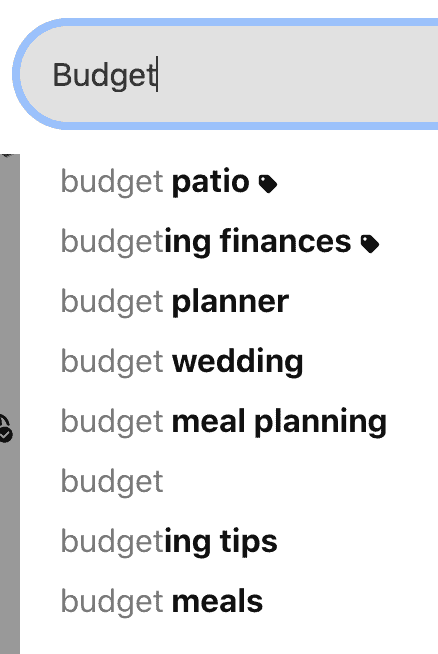
In this example, I have typed in the word BUDGET. As I typed, several options came up for me so I could add additional keywords to my pins. You can see
When you write your description for your pin, you can incorporate the keywords to help your pin get discovered. Make sure your description is written in an easy-to-read format (do not just stuff it with keywords) and includes hashtags that relate to the pin as well.
The best way to add the description is to code it within the image. You can do so with either a plugin or learn how to code it within your image manually.
(Hint: You can use this to update board descriptions and your profile so that you can be found).

Pinterest not sending traffic to your site?
Grab my free quick-start guide to set up your account, learn how to add your boards, create images and develop your strategy.
6. Image size
Pinterest wants long images, not horizontal ones. That means if you need a horizontal image on your site for your blog size but want something different to be pinned, you’ll have to make more than one size.
You can use a plugin called Grow by MediaVine to ensure the correct image is pinned. (You will add the blog-sized image to your post and then add your Pinterest-sized image to the plugin and make sure the correct one is pinned time and time again).
The recommended image size for Pinterest is anything that is a ratio of 2:3 (but no longer than 1260). The optimal size is 1000 x 1500. That creates a long image on the site when shown to users.
You can use a site such as Canva or PicMonkey to make your images. They offer a Pinterest-sized image template you can use. Using it provides you with the exact dimensions you need to make the image the right way.
If you look at the image shared above, you will notice that one is much longer, which takes up more space on the page. This gives the image more Pinterest real estate and gives it much more visibility.
You can add elements and text to personalize your images and make them pop. One great feature about Canva is that you can finish one image and then use the resize tool and change the size to use it for another format. For instance, if you make an image you want to pin and then want one for your website and then need another one for Facebook and one final one for Instagram, you can do that by merely using the resize feature. Just make sure you download the image before you change the size.
To learn how to create these images, read the details included in this post about the 6 Tips to Help Your Pins Go Viral.
7. Branding
If you ever look through the pages and boards of some of your favorite pinners, you might notice that they have a general look to them. They might use the same fonts or colors on all of their images. It is not because they aren’t creative. It is because they are selling a brand. Eventually, you will start recognizing the people you follow just from the font or the overlay on their images.
While it is unnecessary, using a few brand styles helps you create pins again and again with ease.
8. Group Boards
In the past, group boards were an essential part of a pining strategy. In June 2018, Pinterest announced that pins to group boards might receive less visibility as they are devaluing group boards. The reason is that group boards were never intended to be used for traffic. Instead, they were to be for collaboration only. For example, a bride may invite her wedding planner and friends to pin to one board so they can share ideas for her upcoming wedding.
Even though many boards are no longer working, some boards with few contributors and very niched content are still doing very well. If you want to try to find some of these boards, you can do so. But, keep in mind that many boards are no longer accepting contributors due to these changes.
One way to find boards you can visit pingroupie and search through the list. However, I have found that they are not maintaining that site as well as they have in the past, so it may not be up to date.
Another way to find group boards is to search for people who pin the content related to your topic. To start, search for your topic on Pinterest. Then, click on the PEOPLE link.

Go into that person’s profile and look at their boards. Locate one with multiple people in the circle on the cover – as that indicates, it is a group board. Click to open the board and read the description and requirements necessary to become a contributor to the board.
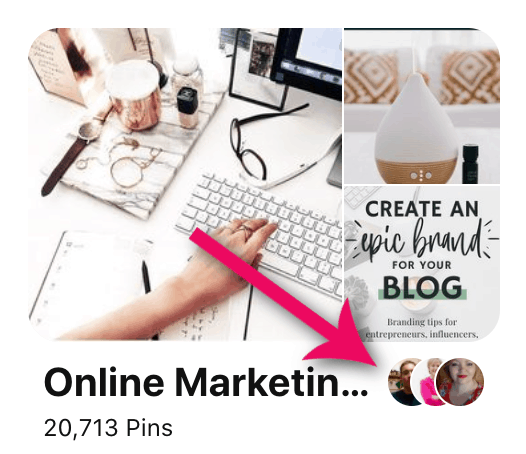
If you want to be a contributor, make sure you first follow the board. Then, you need to follow the board creator. Click on the very first image you see under the list of pinners and click the follow button.
Once you have done that, look through the board description. If the board is closed, then you will not want to go any further. However, it may also tell you what to do to join the board. Follow those steps.
If you do not see any way to join the board, you can send the owner a message and request to join. Ensure you include a link to your profile and blog and let them know why you would be a good fit. Do not take it personally if they say not. If they do not know you, they may not allow you to join.
You can e-mail them on Pinterest by clicking on the message icon next to your profile image and new message. Type in the person’s profile name (i.e., http://www.pinterest.com/traciefobes is mine, you would start to type Tracie Fobes until my name pulled up).

However, I find that I usually have better luck if I e-mail the person directly. Sometimes, the e-mail is in the description. If not, click over to the board creator’s profile and find his or her website. Go there and find their contact details so you can e-mail them. Send them a message that looks something like this:
Hi there! My name is ________ and I run the site ________. I came across your _________ board and would love to be a contributor.
Here is a link to my profile to see the type of pins I create and the content I share. You will find that our niches and audience do align.
Thank you for your time and consideration in joining your board.
Sincerely,
YOU
Finally, check out the profiles of the people you currently follow who are in your niche. Follow the same steps to try to join the board in that way.
9. Regular pinning schedule
Pinterest likes to see consistency. When you pin on a recurring schedule, you show this, and your content will have more of a likelihood of your content getting into the smart feed.
To get started, you will want to find around 4 – 5 of your pins and pin them at the same time each day. The pin should be posted to your relative boards and any applicable group boards. Make sure you rotate what you pin to each one so that you are not pinning the same item repeatedly.
Remember that it is OK, and good practice, to make sure that you repin the same content more than once. However, never pin the same image to the same board more frequently than every 4 – 5 months.
It used to be very important to pin other people’s content, as well as your own. However, that has changed over the years. You can pin only your content if you wish.
However, if you are just starting your blog, you may not have much content yet. Therefore, find other people’s pins to share on your boards to help build them up and teach Pinterest what your account is about (but watch for the stolen pin and do not pin those).
Whether you pin your content or yours and a mix of others, the goal is consistency. One way to easily accomplish this is by using Tailwind. You can try it for free and then continue with that account.
It runs around $10 a month, but imagine being able to schedule 30 days worth of pins in a few minutes each month. That cost ends up saving you money as it saves you time to have to sit at your computer and pin content.
There is, of course, so much more to using Pinterest. However, if you are not yet using it, you need to get started somewhere. These steps should help get you started and on your way to better understanding this platform. I will soon share more Pinterest content, including creating a strategy, reading your analytics, and more.
10. Just Do It
So many people are scared to use Pinterest. They think that it is not the platform for them. They do not see how it will do any good to pin content. You can learn more about mastering Pinterest by investing in Pinning Perfection. You’ll get strategies, tricks and learn how to analyze what works and does not on your account.
The thing to remember is that Pinterest is a search engine. People use this to search for posts on a range of topics. While some are looking for crafts or holiday decor, others want money tips or even travel ideas. Pinterest allows anyone to share anything – no matter the content.

Pinterest not sending traffic to your site?
Grab my free quick-start guide to set up your account, learn how to add your boards, create images and develop your strategy.
HOW TO USE PINTEREST
Once you have your account set up, it is time to get busy pinning! There are three ways to add your pins to Pinterest. The method does not matter as much as getting the right image and description added to your boards.
Manually Upload
When you are first starting out using Pinterest, the simplest way to add pins is to manually upload them to Pinterest. Manually uploading is where you add the image, title, description, and link manually and then tell Pinterest which board to add it to.
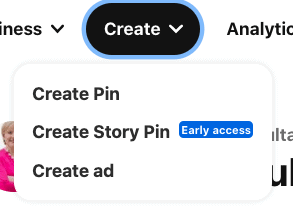
To start, head to Pinterest and click Create > Create Pin.
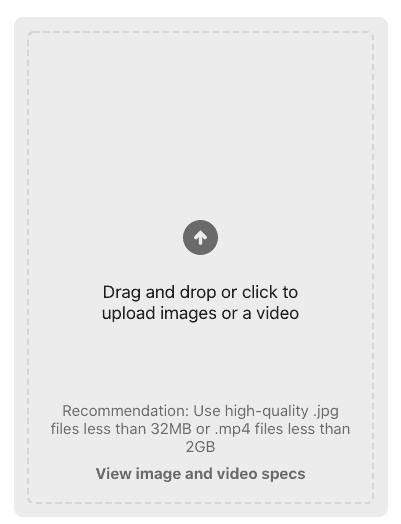
Next, click in the grey box to upload your pin image or video (yep – you can use videos on Pinterest – but make sure they are the same size as your image).
You will want to select the most relevant board from your board list.
Next, add your catchy title. Your title shows in the feed and will get people to click – so make sure it is “click-worthy” so people will want to expand to read more. But, do not make it click-baitish….that will not help.
You will also add a description for the pin. As mentioned above, make sure that it includes the properly keyworded description.
Then, add the URL link to your blog post.
The last step will be to publish it now or later (schedule it).
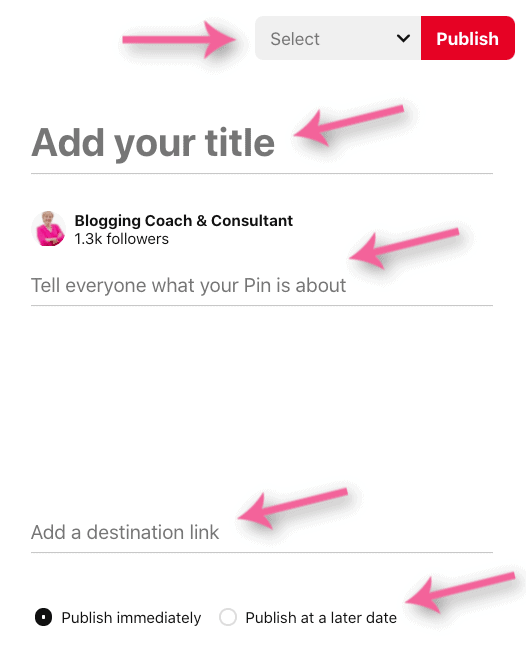
Now, you can click the button to view and see it LIVE on Pinterest!
Pin from your site
The next option for pinning will be to add the pin from your site directly to Pinterest. That means you will need social sharing icons on your site.
The plugin that is most recommended is Grow Social Pro. It adds the small buttons to the top of your post so readers can click and share your content on social. You will use these buttons to pin from your site (another form of manual pinning).

Click the Pin button. You may have multiple pin images added to your post and select the one you want to pin. Then, follow the prompts — making sure to include your description shows and select the board you want to pin it to.
Using a scheduler
You can put your pinning on autopilot by using a scheduler, such as Tailwind. Your scheduler will allow you to add multiple pins, and it will pin the content to the board for you when you would like.
The reason most use a scheduler has nothing to do with better performance. They are used as it saves you time as you can fill the schedule with your pins for a week or more at a time. That way, you pin consistently without having to stop what you are doing or remember to pin daily.
To add your pin, log into your scheduling tool and follow their steps. If you use Tailwind, you can click the social sharing pin button on your post (as seen above). But, when the window show you are ready to pin, select the Schedule Button.
Then, select the board(s) you want to pin it to, make sure the description is showing. You will select the date and time you want it to be pinned and the time between pins (I recommend 5 -7 days).
Select Schedule, and you are done!
These are the basics for using Pinterest. If you want to really leverage the platform and determine how to get your content to rank and be found, check out Precision Pinning. The book helps you learn how to make the system work and analyze what you are doing to make changes and adjustments as needed.

Pinterest not sending traffic to your site?
Grab my free quick-start guide to set up your account, learn how to add your boards, create images and develop your strategy.








In regards to a regular pinning schedule, not sure I am following this. I have about 25 blog posts I have made pins for. I’ve already added them to my boards (although I need to make up more boards). I’ve added some other people’s pins to those boards as well. How do I keep a regular schedule of pinning if I’ve already pinned all of them on the appropriate boards?
You will need to use a spreadsheet to keep track of what you pinned and where. You can use this one that I created that you may find helpful.
https://docs.google.com/spreadsheets/d/1WoMps5B1MHYW5duzDhHeHH_jZPY_ZUXpk_HUU0tMVLs/edit?usp=sharing
Thankyou for such a detailed article. For a dinosaur like me, you make it sound doable. I’m off to see how I go with the help of your Quick Start Guide. 😀
You can do this – I promise!!!