
This post may contain affiliate links. That means if you click and buy, I may receive a small commission (at zero cost to you). Please see my full disclosure policy for details.
The biggest complaint I hear from bloggers about Facebook is that they don’t get any reach on their page. It is tough. And, there are things you can do to get more exposure, but the truth is the page is really only necessary if you want to do sponsored posts.
Regardless of whether you want or need a page, a group makes more sense for bloggers. It is where you establish a community. You build trust, and people get to know you.
The idea of a Facebook group may be overwhelming, but it does not need to be. A Facebook group is smart, as it is another direct connection to the people who are most interested in your content.
Need more Facebook engagement? Grab my FREE Strategy Guide!
You’ve got a group or a page but it’s crickets. Find out what you can do to get more people talking and engaged with your content!
Quick Navigation
Creating a Group on Facebook
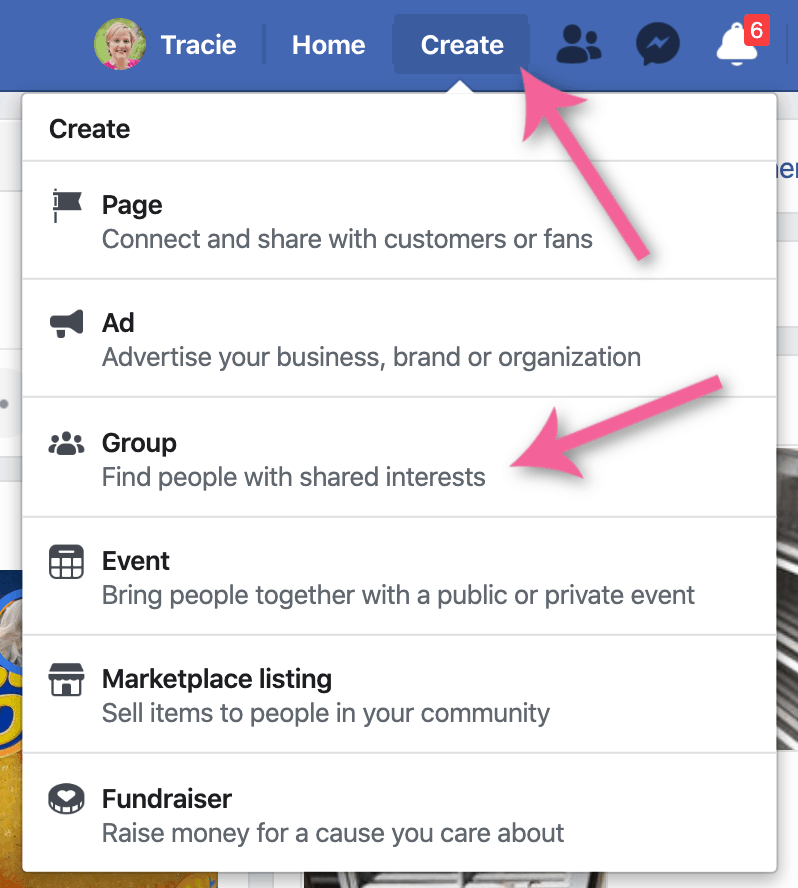
The first step is to create a group. It is super easy to do. From the main menu on Facebook, select Create and then Group.
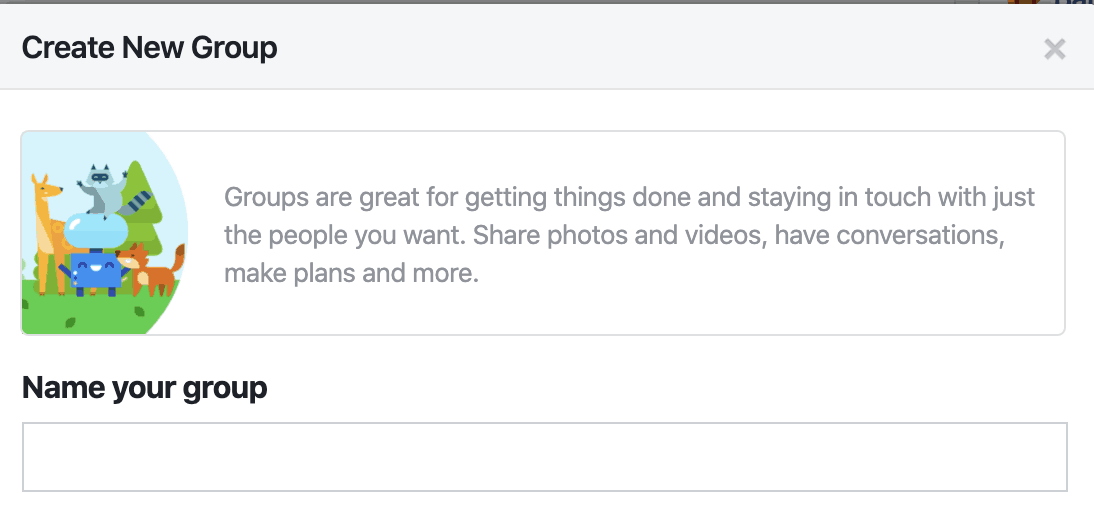
Enter the name of your group. You can call it your blog name or something different that is searchable. You may want to have keywords people look for to help your group get discovered.
For example, my site is TracieFobes.com, but my group is Blogger Education Network. I included keywords in the group name to be found more easily in search so the group could grow.
Next, select the group’s privacy; if you want the content to be visible only by members, select private. That means posts friends make in your group will not be visible to others. Private is recommended.
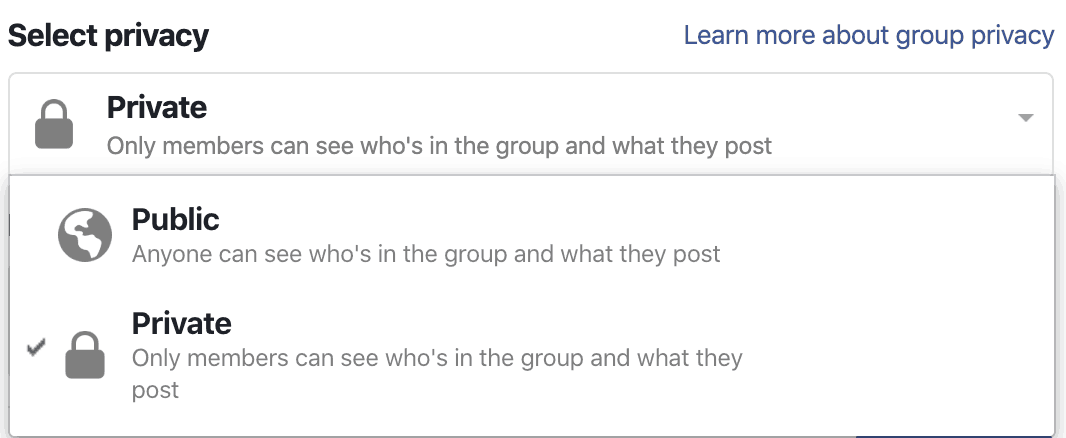
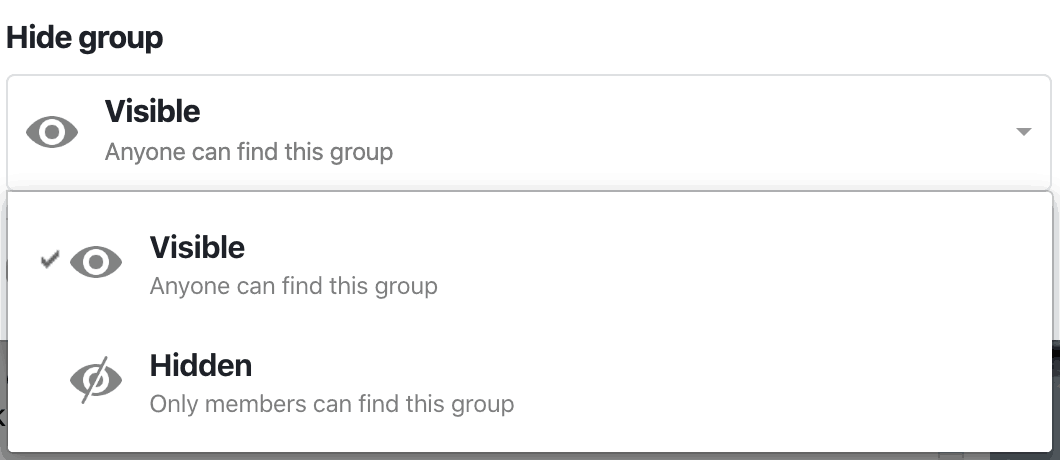
You will then want to select your group’s visibility. That allows it to be found in search or not. It is best to make it visible (hidden is suitable for personal or family groups you do not want people to find).
Hit Create, and you’ve got a group! Now, let’s configure the settings.
Configuring your Facebook Group Settings
Add a cover image
The first thing you will want to do is add a cover image to the group. The proper Facebook Group cover image size for 2020 is 1640 x 856, or a 1.91: 1 aspect ratio. If you make your image outside of these parameters, there is an excellent chance it will be cropped where you do not want it to be.

Updating the settings
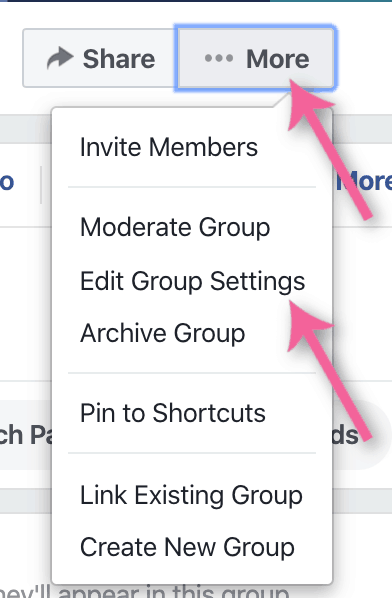
Now, let’s work on the settings for your group! Select the three dots by More from the menu and then Edit Group.
Group Name: If you wish to change it, you can do so here.
Group Type: The default is General (and what most bloggers will use).
Description: Add a description to the group with some of the keywords that will allow it to be found through a search on Facebook.
Location: Do not add one if your blog is not locational.
Tags: Include tags that describe the group, i.e., blogging, motherhood, anxiety, etc.
Apps: If you plan to use external services, such as PostPlanner, MeetEdgar, BeLive, etc., you must give those sites the authority to access your page.
Linked Pages: Link to your main page (if you have one).
Color: Mobile users will see a colored outline when they visit the group. Change to the color that matches your group’s identity.
Web Address: The default address provided by Facebook is a random group of numbers. You can change that to be your group’s name. For example, the default may be facebook.com/groups/1243567890, but you can make that facebook.com/groups/myawesomegroup.
Privacy Setting: You set this when you created the group but can change it here if needed.
Hide Group: Leave checked visible, or people will not be able to find you.
Badges: You can allow members to earn badges. They are the small icons that show next to their name when they post.
Post Topics: When you add content, you can add topics to them so they will be grouped. It is unnecessary, and you can disable it if you do not want to add this feature.
Sections: If you are teaching, you can add sections to help your readers find the various helpful content they may want to find. It is excellent for organizing videos and useful posts.
Membership Approval: Set it so only the owner and admins can approve members (otherwise, group members can add anyone, and it can get out of control).
Membership Pre-Approvals: If you run another group or are an admin, and want to approve people who there into this new one automatically, set this up accordingly.
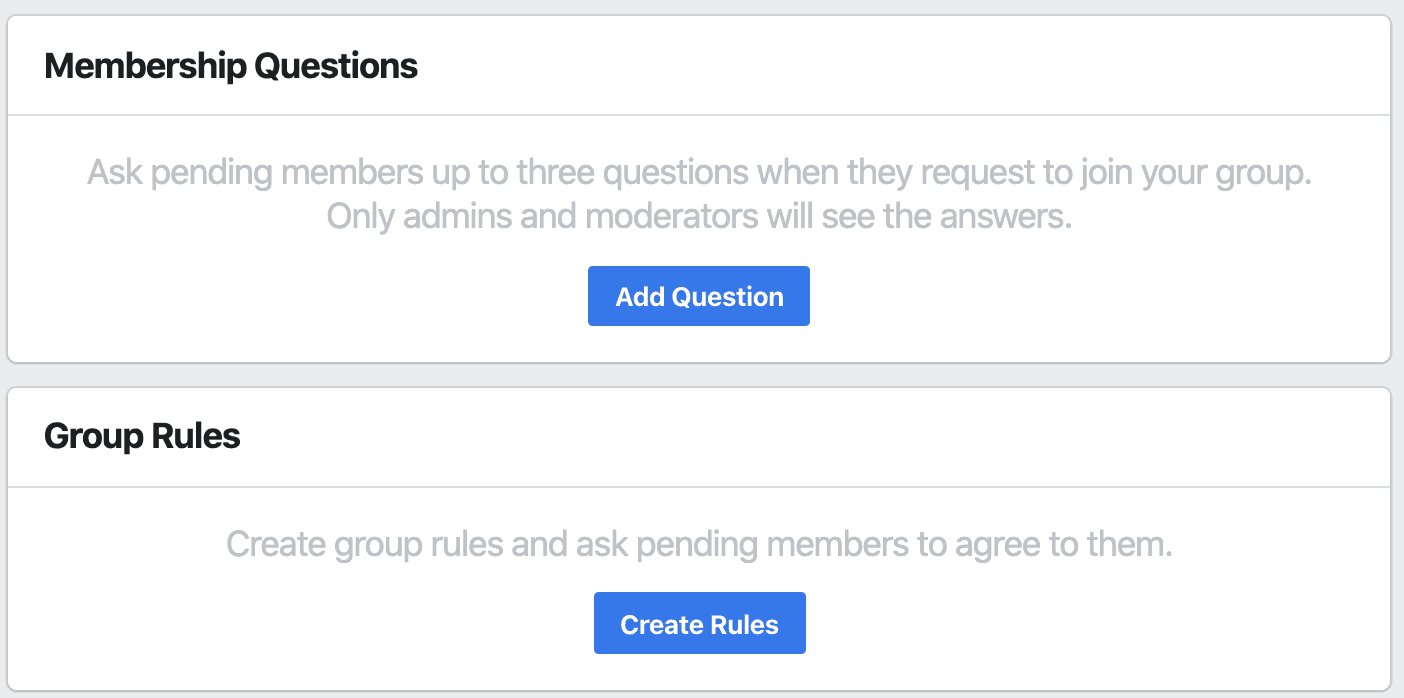
Membership Requests: You will want to add this to your group. It is how you can ask questions and make members agree to the rules for your group. Click Add Question and type the questions you want to add. Some ideas include:
1. How did you hear about this group?
2. Do you want to be on the email list (and then ask them to give you their address – manually add to your provider).
3. Why do you want to be here?
4. What is your goal?
You can also make them agree to the rules, such as no self-promotion, no drama, etc. Click on Create rules, and you will see the defaults are added for you. But then, add in your own rules, as needed.
Membership Requests from Pages: Unless you want pages to join (a form of self-promotion), make sure you check that pages cannot join.
Post Approval: If you want to force all posts to be approved by the admin or a moderator, you can check this box. You can do this for new members, and then, once they are approved, they will be able to post any time they would like.
Keyword Alerts: You can set triggers to get a notification for words in your group. For example, if you do not allow DMs, you could establish an alert and be notified when someone adds that phrase to their thread or comment.

Need more Facebook engagement? Grab my FREE Strategy Guide!
You’ve got a group or a page but it’s crickets. Find out what you can do to get more people talking and engaged with your content!
Tricks to Grow a Group on Facebook
Now that you have a group, you need to get people to join to get the conversations going. There are some simple ways to do it that will take little effort (and no money), so you can increase your members.
Add it to your newsletter
Check out your welcome sequence and invite new subscribers to join your group too! A simple statement is all you need!

And then add it to your regular emails too! You can do it in the content or add a note to the footer in your template, so it shows every time you send an email. Don’t be afraid to ask them to join you – if they love you and are on Facebook, it may make sense for them.
Include it in your blog posts
When you write a blog post, link to your Facebook group where it makes sense. It may mean you mention it in the body or the closing. The more you say it, the more people will find it and you!
Link to your group in your social icons
You may see social following icons on many sites, and most of the time, the default for Facebook is your page. Change that to your Facebook group instead! That way, when readers click the Facebook page to follow you, they will go to your page and can join you there.
Promote in Facebook Groups
Some Facebook groups allow for self-promotion, and your group is a great link to share! Only do it when allowed (meaning don’t go spamming groups with your group link). Read the rules and share where it makes sense.
Link to it on your home page
If you have a static home page, you can include a link to your group right there! It does not need to be big; it can be simple, but don’t be afraid to link to it.

Create an opt-in
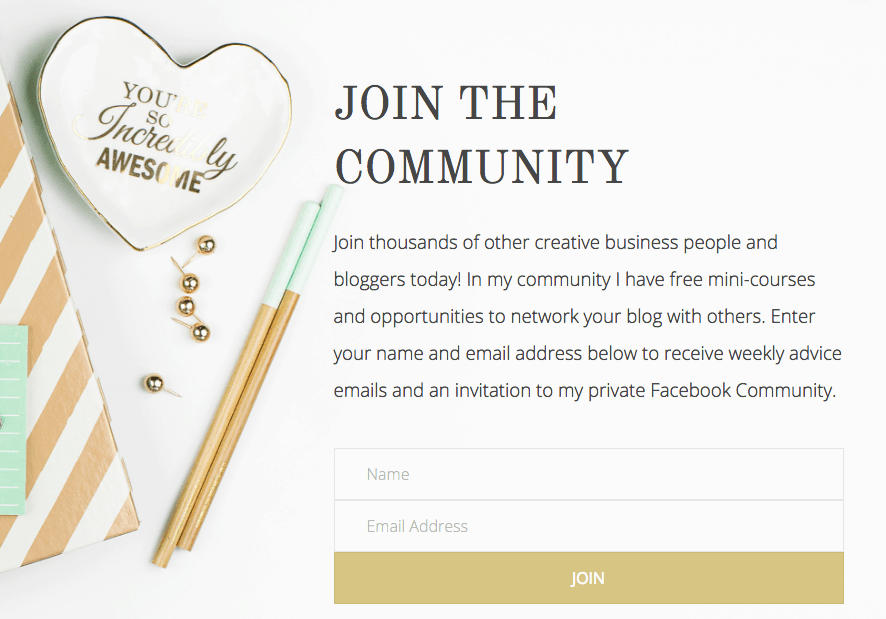
You can get a two for one with this option! Create an opt-in that asks people to join your email list, and you will also send them the invitation to join your group a well! Use the awesome pages you can find on ConvertKit to make one. I love how Holly McCaig has done this:
Link in your sidebar
While the sidebar does not work as well on mobile, it is great for your desktop users! Add a button or banner to your sidebar, asking your readers to join you there.
Add a Hello Bar
Using a Hello Bar is a great way to advertise sales, books, freebies – and even your Facebook group. It is a small striped banner that hovers at the top of your site. You can link to anything you want – including your Facebook Group!
Mention it in guest posts and interviews
Doing a guest post soon? Or, are you getting interviewed on a Podcast? Don’t forget to mention your group! Add the link in your bio for the guest post and your closing on the Podcast.
Get creative about the ways you can promote your Facebook group so it can grow. The sky is the limit when it comes to finding ways to get people to join.
Tips to increase your Facebook engagement
Once you have the group and members, it does not mean that they will naturally start talking. It is going to be up to you to do that. You can’t drop links to your content and run. You have to nurture and help them want to ask questions. Here are some ways to get those conversations started:
Memes/Gifs
Have some fun by asking people to answer a question with a meme or gif. It could be something like “what are you doing this weekend,” “how do you feel about ___________,” or even “How excited I am to see _________.”
Your members will be more engaged if they can answer in this simple way rather than type a question.
Welcome & Tag New Members
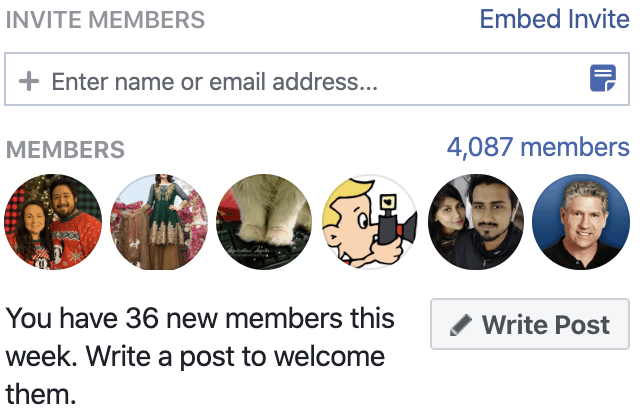
Facebook is great about helping you with this. You will see a box that shows your new members, and it a button that says Write Post. When you click this, a status update is added, and all the members are tagged.
Type your welcome, including a link to your newsletter, course, products — whatever it is you want. Welcome them and ask them to share a little about themselves. They’ll feel that they are a part of the community.
Go Live
A great way to get people engaged is to go Live in your group! It puts a person behind the admin name, so they see you. They can watch the replay, talk, ask questions, and will engage with that content.
Respond to Every Thread
It may sound like a lot of work, and it is, but when you respond to every thread, you are adding to the engagement that Facebook sees. You are also getting more personal and connecting with your members.
Don’t be self-promotional
It is OK to share a blog post, offer, or feature once in a while, but your group should not be only about you. It needs to be a place where members can learn and have fun. Yes, you have fantastic content, but no one wants to hear you promote yourself day in and day out.
Mix up the content to share others and your own, as well as gifs, memes, and questions.
Put units to work
One feature you find in groups is units. You can organize your content and lessons here. That allows readers to find what they need when they need it. You could use it to make a free mini-course, funnel, or other means to get them to your content and products.
Use a poll
People like to give their opinion. A poll can not only be an excellent way for you to get them talking, but you’ll get content and product ideas too!
How to handle drama or rule breakers
You need to have rules in your group. That way, everyone agrees to expectations, and if someone does not meet them, you have recourse.
Decide what you will and will not allow
Some groups may not want any self-promotion of any type, and others may. You may also not want certain curse words or phrases mentioned. It could be that you don’t allow links to other sites.
Whatever you want, make sure it is clearly stated in the rules, so readers know when they join and agree to them. Then, if they break those rules, you have options.
Delete the comment but leave the member in the group
When you delete a comment or a thread, you have the option to share the reason why with the member. You can gently remind them that you do not allow “X” in your group.
Delete the comment and turn on post-approval
Another option available to group admins is the ability to make a member’s comments or posts get approval before showing in the group. If you happen to remove one comment, you can watch what else they post before it is in your group.
Remove the member
If someone violates the rules, you can kick them out of the group. The options will be to remove them, and they can try to join again later, or you can ban them. If you ban, they will no longer be able to find the group or ask to join.
Message the member
Sometimes, the infraction is a misunderstanding. You can send an email to the person in your group, letting them know what you do or do not allow and reminding them to check the rules before commenting or posting again.
Use Two Strikes
Sometimes members make a mistake, so you may not want to remove them the first time it happens. Give them a warning. However, do not hesitate to remove them should they do something again.
Know it is OK to kick people out
It is your group – your rules. If you have pot-stirrers, drama queens, or trolls, do not hesitate to remove them.

Need more Facebook engagement? Grab my FREE Strategy Guide!
You’ve got a group or a page but it’s crickets. Find out what you can do to get more people talking and engaged with your content!
A Facebook group can be a great way to grow a community and network with those in your niche. They do take a little time to run but are another way to get traffic and increase your income.








Hey there! I just wanted to ask if you ever have any
problems with hackers? My last blog (wordpress) was hacked and I ended up losing a few months of hard work due
to no data backup. Do you have any solutions to stop hackers?
Use WordFence to keep them out of your blog. That works well.
I have a niche group with about 5000 members. What tactics can I use in the group to get more members to grab the freebies/lead magnets offered on my blog and therefore, opt in to my email list? Thanks for this post and your thoughts on my question!
Use the freebie as an idea for a post. Post a question and the solution and include a link to the freebie for them to learn more.