
This post may contain affiliate links. That means if you click and buy, I may receive a small commission (at zero cost to you). Please see my full disclosure policy for details.


As a blogger, you want to get traffic to your site and make money. One of the simplest ways to do this is through your email newsletter.
But, getting those people to want to sign up can pose a challenge. The simplest way to get people to sign up for something is to give them something for free.
You will want to create an email opt-in (sometimes called a lead magnet or freebie). It is simpler than you think, and getting it to your subscribers can be set up on autopilot.
Think about the blogs that you follow. Go back and look at their site and their email newsletter sign-up boxes. How many of them offer something free if you sign up? Chances are, most of them do this. They do it for one reason. It works.
An opt-in may seem like a great idea, but how do you create one?
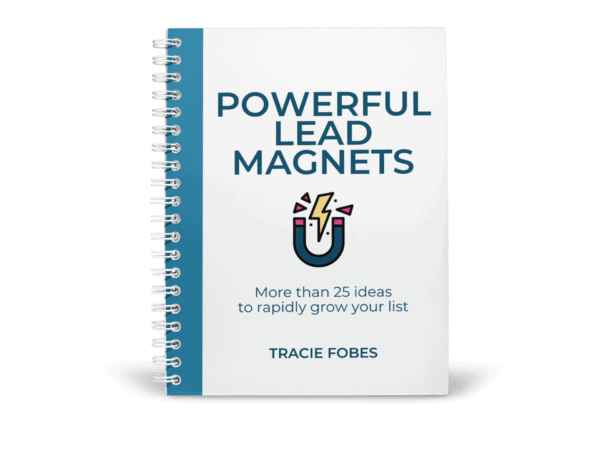
Struggling to know what to offer to your list? Get more than 25 lead magnet ideas!
The secret to growing your list is to offer your readers what they need. Grab my free download and stop stressing about what to create.
Quick Navigation
WHY YOU NEED AN EMAIL LIST
If you are new to blogging, you may not even know what an email list is. Your email list is the readers who sign up to get regular newsletters (via email) from you. They sign up because they are interested in your site and want to continue to learn more about what you have to say.
The #1 reason you need an email list is that you are in control of getting your content out to the people who want to see it. You know you can’t rely upon Facebook or Pinterest as the algorithms are always changing. Sure, you post there, but not everyone will see your site.
Several years back, Facebook showed every post made on every page in your newsfeed. As a marketer, it was such a simple way to get traffic as everyone would see what you were doing. Then, they made changes, and it all disappeared – overnight.
Traffic tanked, and it left bloggers struggling to find a way to make up that lost traffic. The same can be said for Pinterest. Many algorithm changes have harmed traffic to blogs and websites.
Social media is the one marketing tool over which you have no control. However, when it comes to your email list, you own it. You control what you say, when it is shared, and even who will see it.
Not only do you have more control, but the people on your list are interested in the content on your site. They are often more engaged and willing to click to read your posts and, more importantly, buy the products you recommend! Your email list is a simple tool to help increase income.
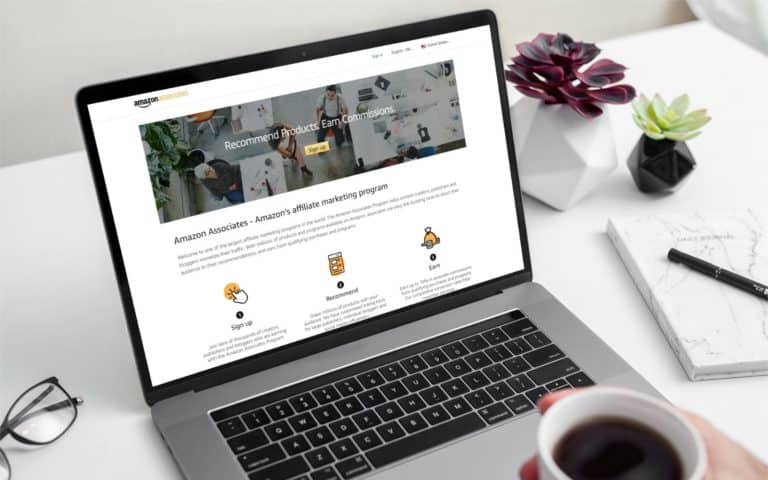
If you have not already done so, you will need to sign up with an email provider. There are a few platforms I have recommended, including ConvertKit, MailerLite, MailChimp, and ActiveCampaign.
If you are new to creating a list, I would advise starting with MailerLite. It is free up to 1,000 subscribers so that it can help with your budget. I use ConvertKit for both of my sites, but the fee starts at $25 per month.
The first thing to do is get signed up with your email provider. Each of them offers tutorials and help to get you started. They will share how to place the link on your site, create up forms and boxes, and link that to your blog posts.
HOW TO GET READERS TO SIGN UP FOR YOUR EMAIL LIST
The simple way to get readers to sign up is to have blog content that they want to read. Therefore, you must be 100% authentic and original. Be yourself. However, that is not the only thing you need to do.
As the title of this post explains, you need an email opt-in. You clicked to read so you could learn what to do. You need to do the same on your site.
Create content that makes your readers coming back for more.
WHAT IS AN EMAIL OPT-IN?
An opt-in is a free item that you offer to entice people to sign up for your list. It is also called your lead magnet.
It can be a printable image, e-book, infographic, checklist, template, cheat sheet…..almost anything you want to offer. It must be in a digital format to be emailed directly to your subscribers (via your email provider).
HOW DO YOU DECIDE WHAT TO OFFER?
The easiest idea is to find the content on your site and look at it. Perhaps you have a post series that you could turn into an opt-in. Or, maybe you have a post that you could write in more detail to make a better printable checklist.
You might have ten recipes that relate to one another that you could put into a book. It could even be a new idea about something you want to market to your readers.
Whatever you decide, make sure that it relates to your site. For example, I’d never put a printable about essential oils on this site as it is about blogging and social media. I don’t blog about that, so my readers would not be interested in it. It would confuse and alienate those who signed up thinking that I would have newsletters talking about oils. Imagine the shock when they get an email about creating an opt-in! They’d all unsubscribe. I’d lose credibility.
Find something that you feel would be helpful to your readers.
HOW DO I CREATE AN EMAIL OPT-IN?
Once you know what your opt-in will be, it is time to create it. There are some simple ways that you can do this — all of which are FREE!
SITES TO USE TO MAKE A PRINTABLE OPT-IN
If you are using Photoshop, you may already know how to use that to make a printable form or infographic. If you don’t have this software, there is no need to buy it. You can use different things that you may already have access to that will not cost you a dime or a small annual fee.
USE GOOGLE DRIVE
You can create a document in Google. Once it is in the format you like, download it as a pdf. Add to the link or file to your autoresponder.
CREATE OPT-INS USING WORD
If you have MS Word, you can also create your opt-in form here. It can also be saved in a pdf format so that you can add it to your email autoresponder.
USE CANVA FOR INFOGRAPHICS AND PRINTABLE FORMS
If you want graphics on your opt-in, Canva is a great resource. They even offer different templates that you can use (infographic templates are incredible).
Most elements are free, but some cost $1. If you pay for it and you can edit your document for up to 24 hours after you first download it before you need to pay for the element again). Make sure you export this as a pdf as well.
No matter which site you use, make sure any printable (book, printable, or infographic) save it as a pdf. That is the proper download format to use.
HOW DO I GET A SCREENSHOT OF MY PRINTABLE TO ADD TO MY SIGN-UP FORM?
Once you have the printable done, you will want to grab a screenshot so that you can add it to the sign-up boxes. Using the image can increase conversions and give the readers more reason to sign up — as they can see what it is they will receive.
No matter how you made the printable, it should be in a pdf format. But, you can’t add a pdf as an image to your form. That means you need to create a thumbnail of your printable to add it to your form. There are a couple of ways to do this.
CREATE A JPG OF THE PDF
One way to get your printable download is to convert or save the printable in a jpg format. That takes it from the printable to an image that can be manipulated. Then you will add it where needed (such as forms and other places in your blog posts).
If you use Canva to make your printable, save a copy of your form and download it as a jpg rather than a pdf, and you’ll have what you need.
For those who do not use Canva, you will need to convert the file. Mac users can easily do this with the Preview App. Open the pdf and under File, click on Export and when the window comes up, change the format to jpg and hit save.
Whether you use a Mac or PC, you can also use an online converter to change your PDF to a jpg format. One such site is PDF to Image. Follow the steps to get your form in the right format.
Keep in mind that the image is still full size, so you will need to reduce that size further if you wish to upload it to your form (see the next step).
HOW DO YOU SEND THE FREEBIE AUTOMATICALLY SENT WHEN SOMEONE SIGNS UP?
You will create your freebie and then sign up with your email service provider (i.e., ConvertKit, Mailerlite, etc.). Then, it is time to set up an autoresponder.
The autoresponder is the email that is triggered, sending an email out once someone signs up for your newsletter. You need to set one up, as you sure don’t want to email every single person manually!
Each email service has an autoresponder. Each site may call it a different name. For example, on ActiveCampaign and ConvertKit, it is called Automation. I’ll walk through how to do this through a few various providers to know how to do this yourself.
CREATE CONVERTKIT AUTORESPONDER
Click on Forms in the top menu.

Then, click on New Form right beneath the graph.

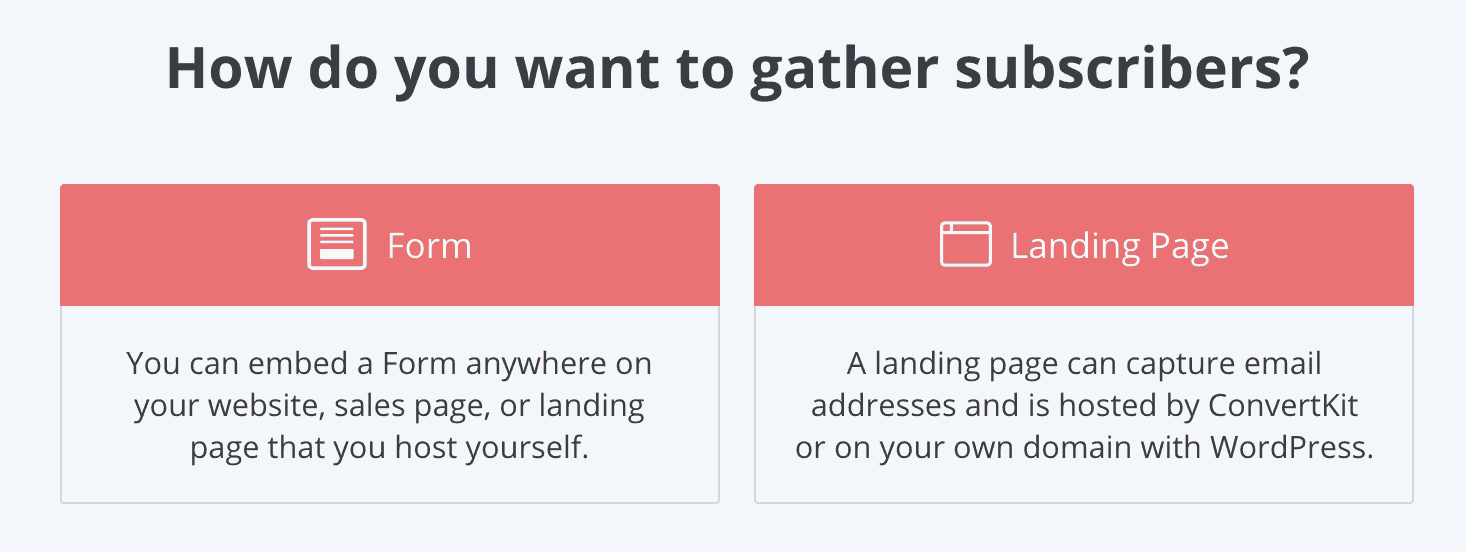
Next, decide if you want a landing page where people will go to sign up. Or, you can create a form that you can easily embed into your posts. For the sake of this lesson, we will use forms.
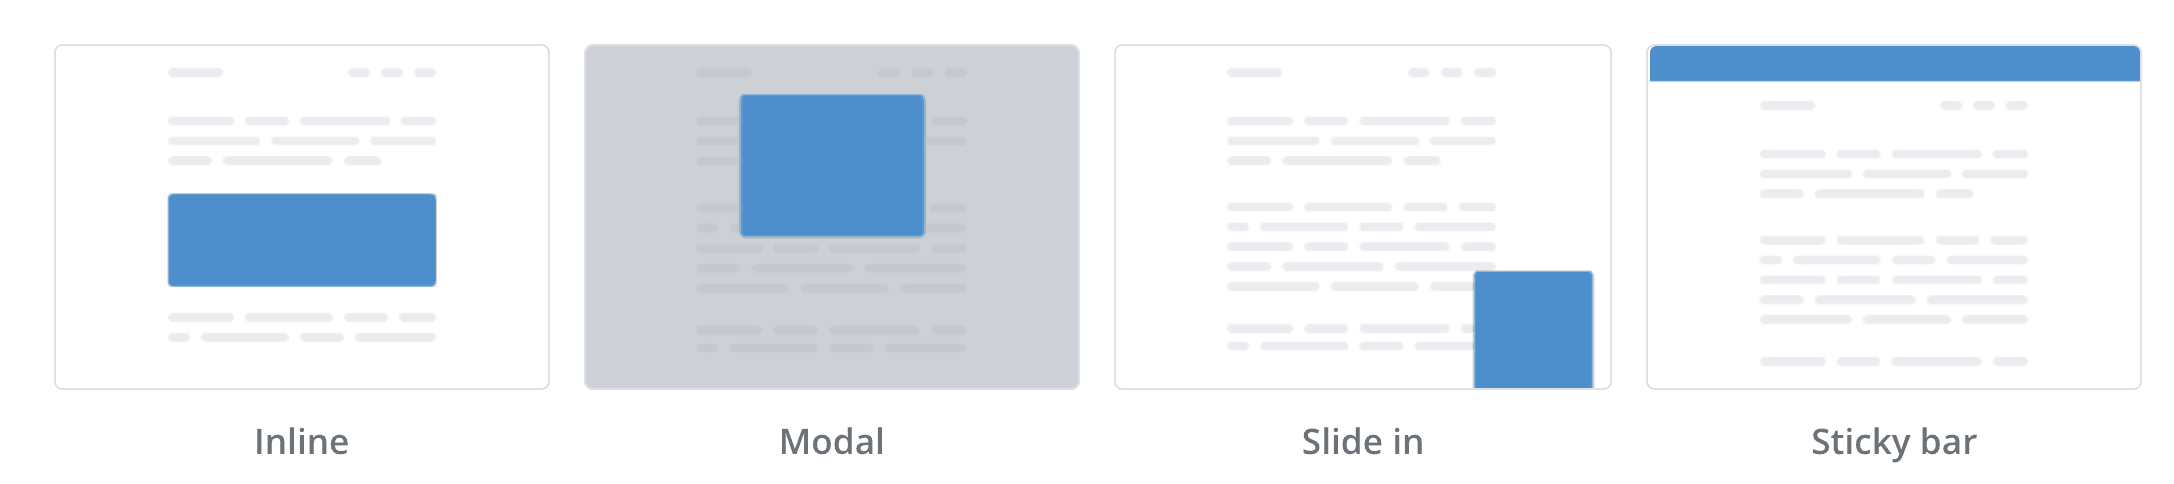
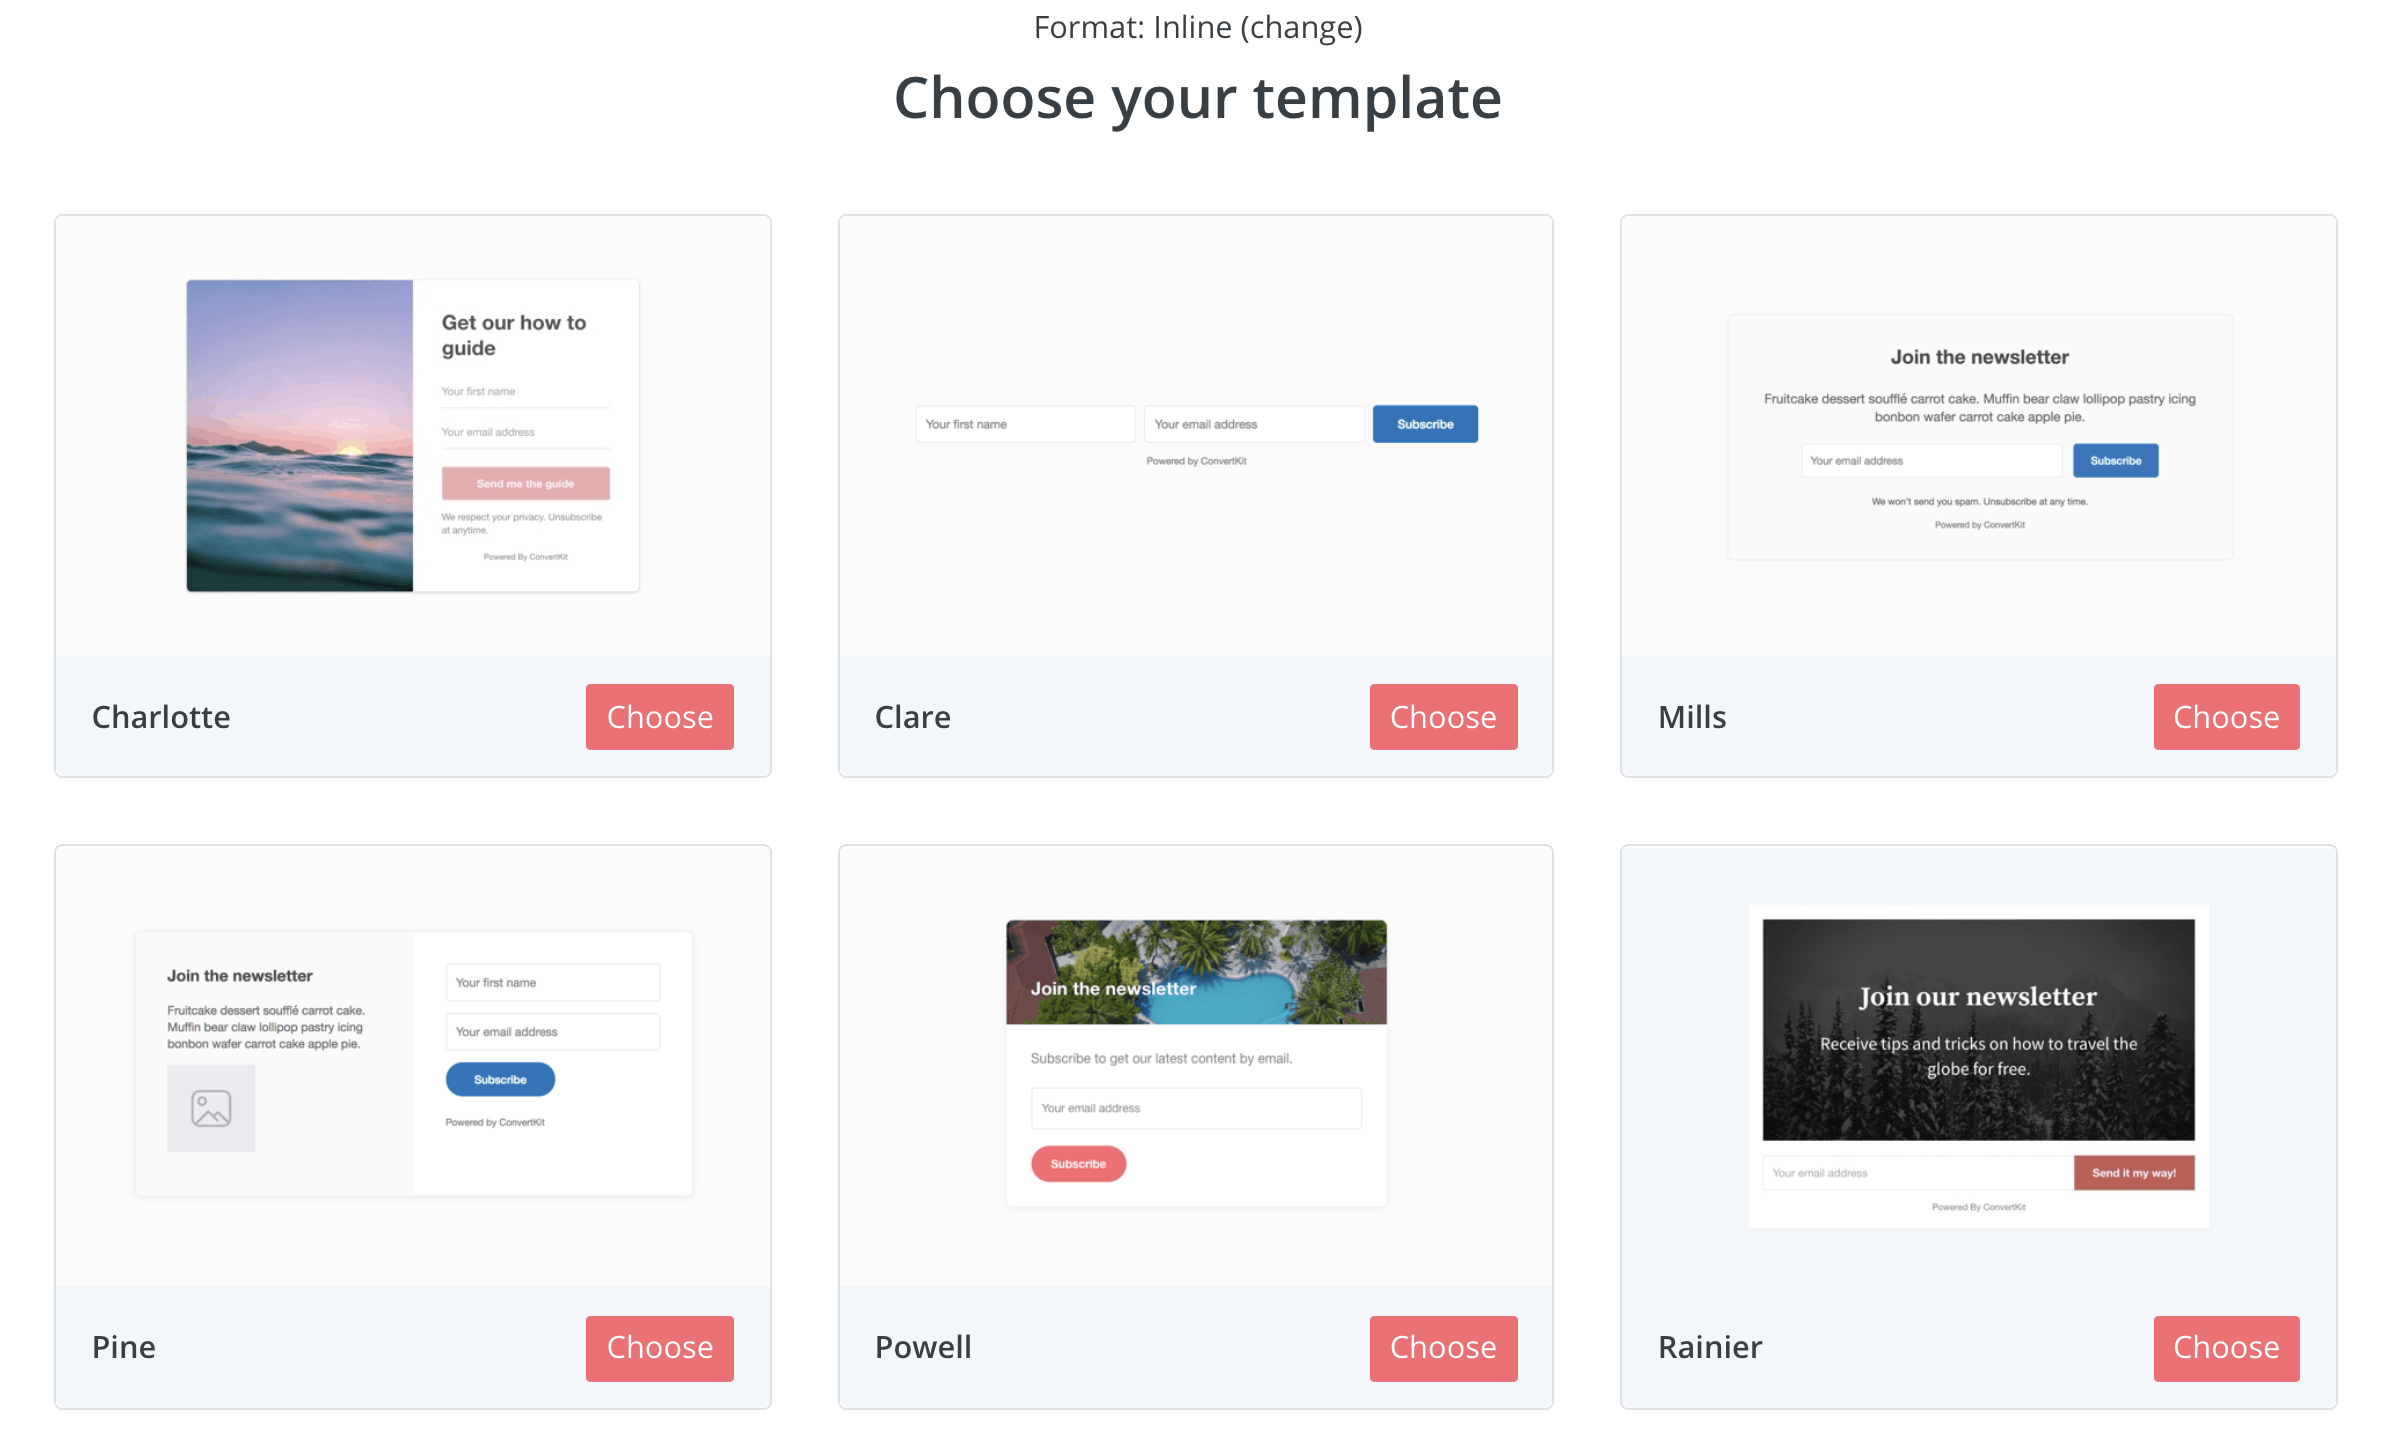
Now you are ready to make the sign-up box! Select the form style you want to have on your site. There are three options:
- Inline – the box you will create to embed into a post.
- Modal – one that will display after a certain point as the reader is on your site.
- Slide-In – the form that slides in at the bottom of your site.
- Sticky Bar – will show at the top of every page.
I recommend using the inline to get the code to embed where you see fit in your content. Once you make the form for your post, you can then try your hand at one of the other two types of sign-ups.
Then, select the type of sign-up form you want. There are six options. You can see how the form looks by checking the sample in front of you. Since you are adding a screenshot of your printable, let’s select Charlotte.
Adding the preview allows users to see what they will get when they sign up, increasing conversions.
Now comes the fun part! You can customize the font, colors, and wording!! The menu to make these changes runs vertically along the side of the screen. Click on each section and made the necessary edits.
To start, you can click on each section of the form. For instance, you will notice the button edits menu slides in if you click on the button. Edit each section as needed so that the form says what you need. You can also upload the thumbnail image of your printable by clicking on the image on the form.
Once your form looks the way you want, review the remaining settings and set up the confirmation email so that they get their printable once they agree to be on your list.
Magic Wand Icon – You will add your printable preview image here. Note that it may take trial and error to get the image to be the exact size y0u need or want.
You can also change the background of the sign-up box and the box’s corners to get the look you want.
Gear Icon – Type in what you want to display once someone signs up for the form! You can edit their message and type your own. You can also redirect them back to a specific page on your website (if you have a tripwire or bonus offer, you will put that link here so that as soon as they sign up for your form, they see your offer).
Envelope Icon – Here is where you will include the link for the printable form. First, select the Edit E-mail Contents box and update the subject line and content to be what you want it to say.
You could say something such as: “Thanks for signing up! Just one more step and you’ll get your _____________ download. Click the button below to confirm your subscription, and the download will happen automatically.”
Save those changes, and you will be back at the “envelope” menu. Click the download button and upload the printable. That way, once they confirm their subscription, the download will happen automatically.
If you happen to have your printable in a Resource Library, you will put the link under “Redirect to this Link” to send the user to the library page. If you do this, make sure you include the password details in the email contents!
Double Gears – These are the advanced settings. If someone has already signed up, you may or may not want to show the form to them again. You can edit that here.
The final step is to update the name of the form. Make sure it is something you will recognize. Then, select Save, and you’ve got your form. You are ready to add it to your site!
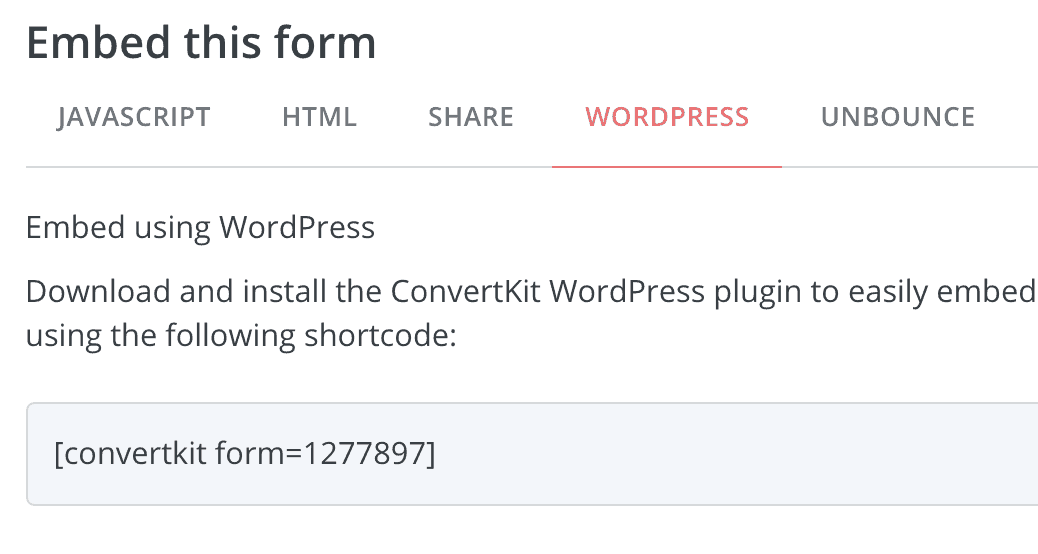
Click on embed from the grey box, and you will see the coding options. Copy the shortcode, go to your site, and add it where you want the form to appear in your blog post or on your site (but make sure you use the HTML setting and not visual when placing the link).
The final step is to open the ConvertKit plug-in (located under settings) and refresh the forms. That will force the new connection so that your site can read the code from ConvertKit, so the form is displayed.
There you go! The simple way to create an opt-in using ConvertKit.
SETTING UP A MAILERLITE AUTORESPONDER
Another popular email provider that many bloggers use is Mailerlite. You can easily set up an autoresponder to deliver your freebie through them as well. Before you jump in and try to make your first automation, you need to do a few other things.
Once you have the printable saved as a PDF, upload that to your media library on your site. Just click on Media > Add New and upload it directly to your site.
Next, log into Mailerlit so you can create a group for your opt-in. That way, Mailerlite knows the people who get the form that they are signing up for (you will do this for each opt-in you make, so you ensure the right form is sent to the right people).
From the main menu, select Subscribers.

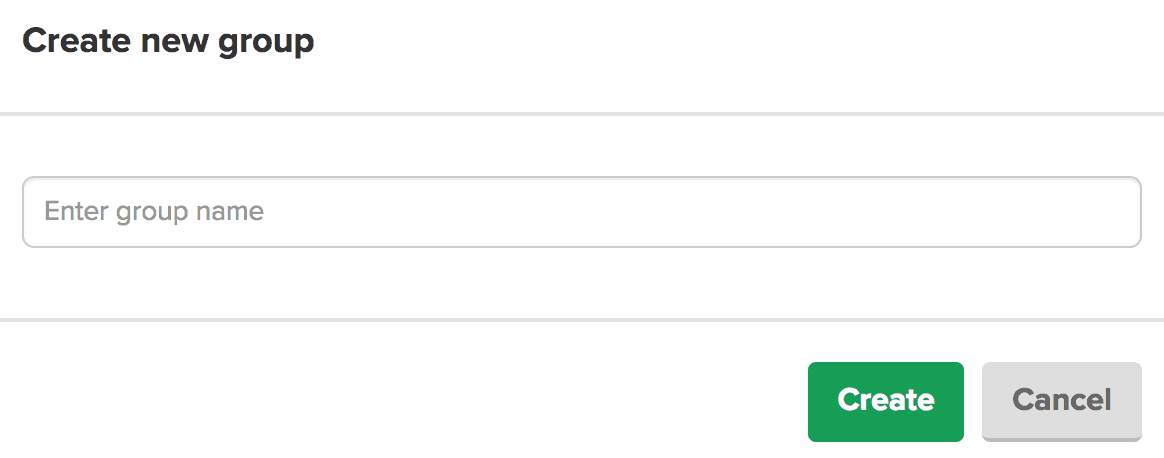
When in Subscribers, select Groups — and then Create New Group

Then click on Create New Group.

Give the Group a Name — such as the name of the opt-in you are going to create. That will help you quickly identify it.
Now, you are ready to make a form. It is what you will put on your site so that readers have a box where they can enter their information to get your amazing printable.
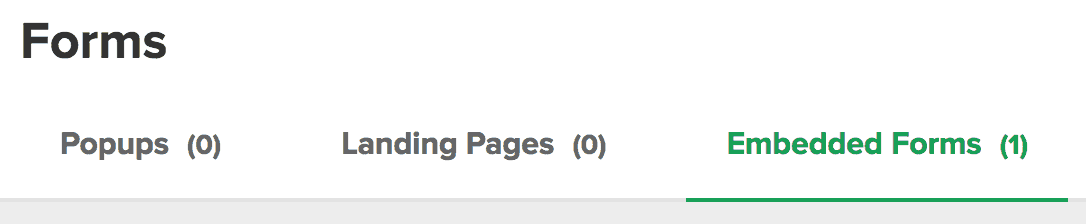
From the main menu, select Forms.

Determine if you want to make the form a pop-up, a landing page, or an embedded form. An embedded form is the one you will select if you want to put a sign-up box anywhere in your blog post (and that is what we are using for this lesson). Click the gold Embedded Form button you see at the top of the page.
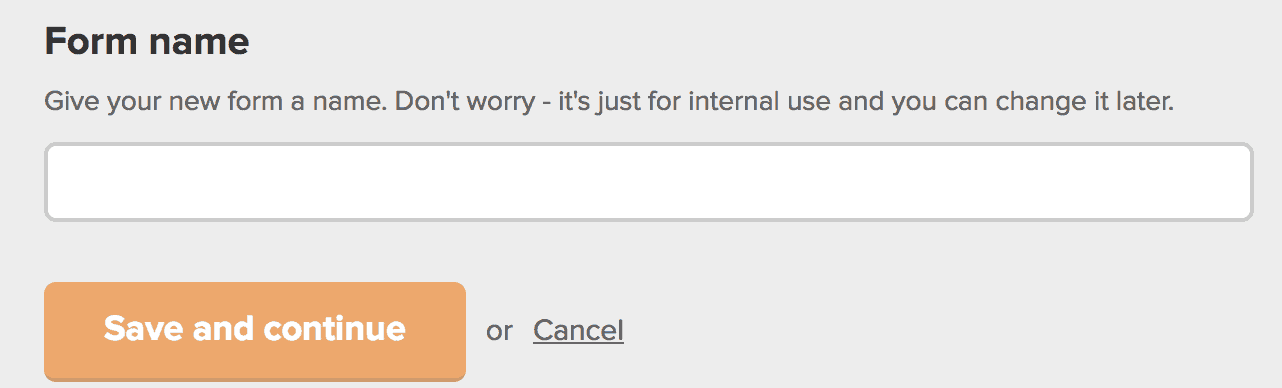
Give the form a name. Make sure it is something you will recognize. A good idea is to use the opt-in name, so you can quickly identify the form in your list.
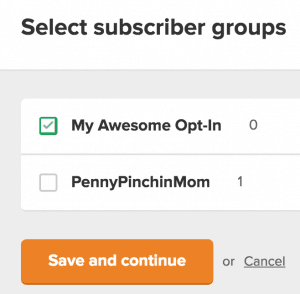
Select the group connected to this opt-in – which should be the one you just created.
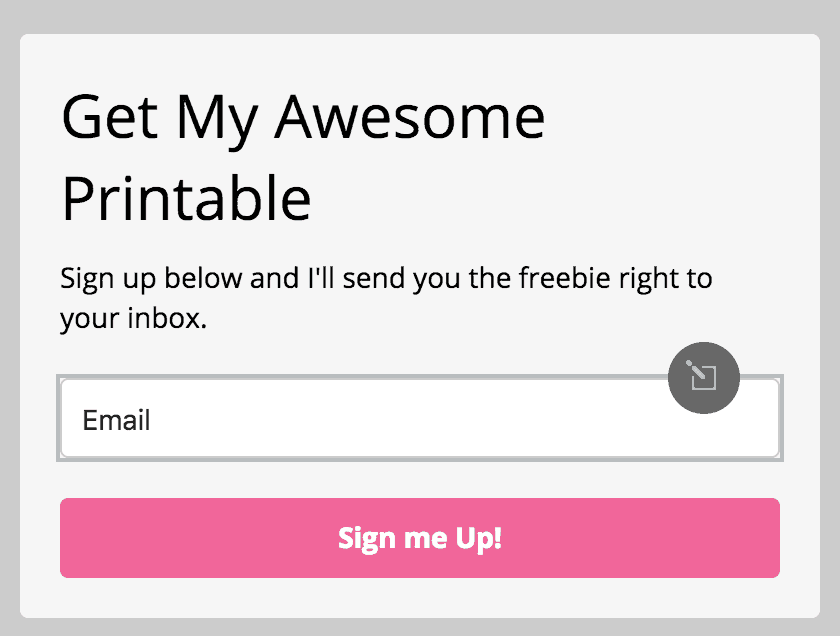
Edit the form to make it look the way you want. Change the color, text, and design. Once you like the way it looks, select next. You can hover on the boxes on the form so you can edit the content in each.
Once it looks the way you want, click on next. You can then make sure it is a double opt-in, add them to a list, etc. Once you are satisfied with those settings, you can get the code to embed the form directly into your post.
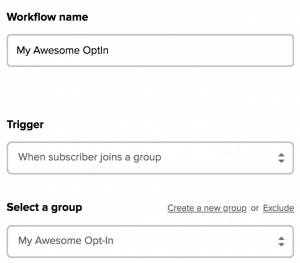
Now, you are ready to set up the autoresponder. From the main menu, select Automation and then Create New WorkFlow.
Give the workflow a name and then, from the drop-down-down, decide what will trigger this to start. You will select the group that you created for this opt-in.
Click the “+” button beneath the workflow to add a step to the automation. You will then select email from the available options.

You will fill out all of the sections from the side menu, including the subject line for your email, your name, email address, and then click to edit the email contents. You can just type the email with the rich editor or use one of the drag and drop templates to create your email. For simplification, we are only using the rich editor.
To link to the printable, go back to your site to find the pdf you uploaded. Navigate to Media > Library. The pdf should be at the top of the list (or you can search for it). When you see it, click to open, and then, under the save box, you will see the URL for the link. Copy this entire link.
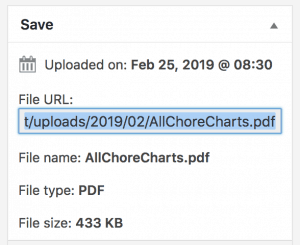
Go into the email and click the LINK button at the top of the form. You will link to THIS pdf. That way, it will be in the email for them so they can click and download it.
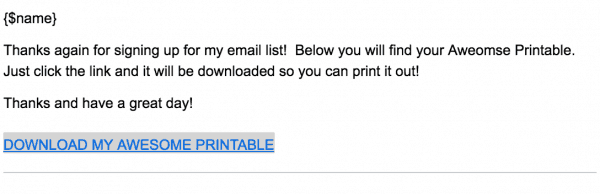
This is what the email will look like. You can see that the link for the printable is embedded right here.
Congratulations! You just set up your first autoresponder!
CREATE AN ACTIVE CAMPAIGN AUTORESPONDER
It is also easy to create an opt-in on ActiveCampaign. Before you start, make sure you create a list for the opt-in (as you will use it in the next step — go to Lists, Add a new list and fill in the boxes). Then, click on Automations from the blue menu bar.

Then, click on New Automation.

In the search box, type opt-in. There will be one recipe that pops up. Select it.
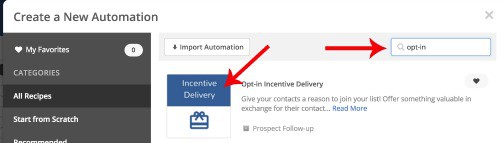
You will see some additional boxes come up to help guide you through the process. Follow the steps and fill out the sections as needed. You will then see a flow chart like this:
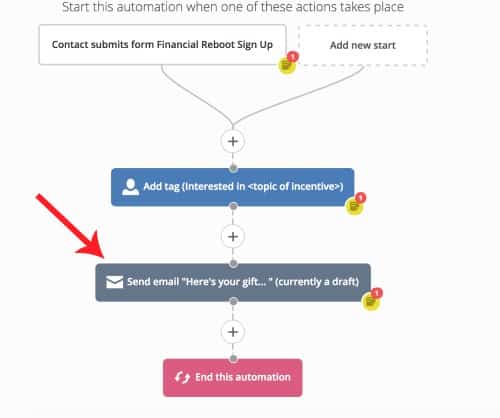
Click on “Here’s Your Free Gift” so you can edit it. You will want to create an email. Click on this. You will then be able to create your email. Just make sure that you include the link to your pdf (which you will want to have hosted on your site, in your media files).
Follow the rest of the steps to start your automated sequence.
ADD THE SIGN UP TO YOUR SITE
Once you have created the opt-in and the automation to send it, you have to advertise it on your site. There are some simple ways to do this.
ConvertKit. If you use ConvertKit, you can either copy the code (see above) or use the plug-in. If you use the plug-in, you will see this option on the dashboard and can select the form from the drop-down. Keep in mind that this places the form only at the bottom of the post. If you want it anywhere else, you will need to embed the code.
Your email provider. Look at the options available through your email provider. Some may offer opt-in forms, but most do not. The majority of them provide a simple link that you place on your site, which is not a true opt-in form. Make sure that what your readers see tells them what the opt-in will provide to them.
ThriveLeads. This is another plug-in, as well. You can add your opt-in form on a post, pop-up, or even as a welcome bar (at the top of your site). What is great about this service is that you can test two forms against one another, and it will automatically keep the one with the highest conversion.
For instance, if you are not sure if a slide in at the bottom of your page works better than a hello bar at the very top, you can have those two compete against one another for some time. At the end of the testing period, ThriveLeads will determine which one was more successful and keep that one live on your site – but disable the one that does not do as well.
Also, you can create opt-in boxes and place code anywhere in your posts you would like for the form to appear. You are not limited to placement at the bottom of your post (such as with ConvertKit). ThriveLeads is a paid product, but the investment pays for itself very quickly.
Struggling to know what to offer to your list? Get more than 25 lead magnet ideas!
The secret to growing your list is to offer your readers what they need. Grab my free download and stop stressing about what to create.
HOW CAN YOU USE INCENTIVES AND STILL BE GDPR COMPLIANT?
In 2018, there was a new law enacted in Europe called GDPR. It stands for General Data Protection Regulation. It ensures that readers understand how information is collected and how it will be used. One of the topics was email lists. Readers have to decide to sign up for your list and must know that they will be added to it. You can’t force them to sign up for a freebie.
However, there is a way around this.
Your freebies are exclusive subscriber offers. As a thank you for signing up, you will give them your printable. I love the way that Thrive explains this on their site. It is an easy read and is written in an obvious way.
As long as you are clear in the wording on your sign-up form, you will comply.
It takes a little time to create your opt-in and the mailing sequence, but you’ll start to see those email opt-ins begin to increase!


Thank you for a great resource. It would be a great idea to include a section on using Mailerlite and Mailchimp to grow your email list. Many new bloggers start with these ESPs as they are free.
Thanks Tracie, great post on printables and email lists. I do agree with Poovanesh, if you have the time. Those low subscriber, free starter accounts are ideal for beginners.
I am working on this one right now and will be able to help with that part soon too!
Tracie – that part about converting your PDF to JPG. Another way to do it is bring your PDF up on the screen so you see all of it. Then in Windows use the Snipping Tool to grab a copy and save that as a JPG. Same goes for Mac (whatever the Mac screen snip tool is).
Mike
Thanks for this. I finally have my email connected to freebies (even though Mailerlite gives me a headache
You are welcome! And you aren’t the only one who feels that way about Mailerlite. 😉
Tracie!
You’re my girl! By reading your tutorial I was able to get what I needed done. You are a lifesaver! Thank you!
Yeah!! I am glad that I was able to help!!